Okta setup
Before a sensor can take part in a verification, the person using it signs in with their corporate identity. This guide shows you how to create a SlashID app integration in Okta so your users can authenticate with Okta, and how to provide the resulting credentials to SlashID.
First, you will create an OIDC app integration, set the SlashID sign-in redirect URI, and assign the people who need it. Second, you will enter the Client ID and client secret in the SlashID Console.
Step 1: Create an Okta app integration
Log in to your Okta admin console as an administrator.
From the menu on the left, select 'Applications' > 'Applications'.
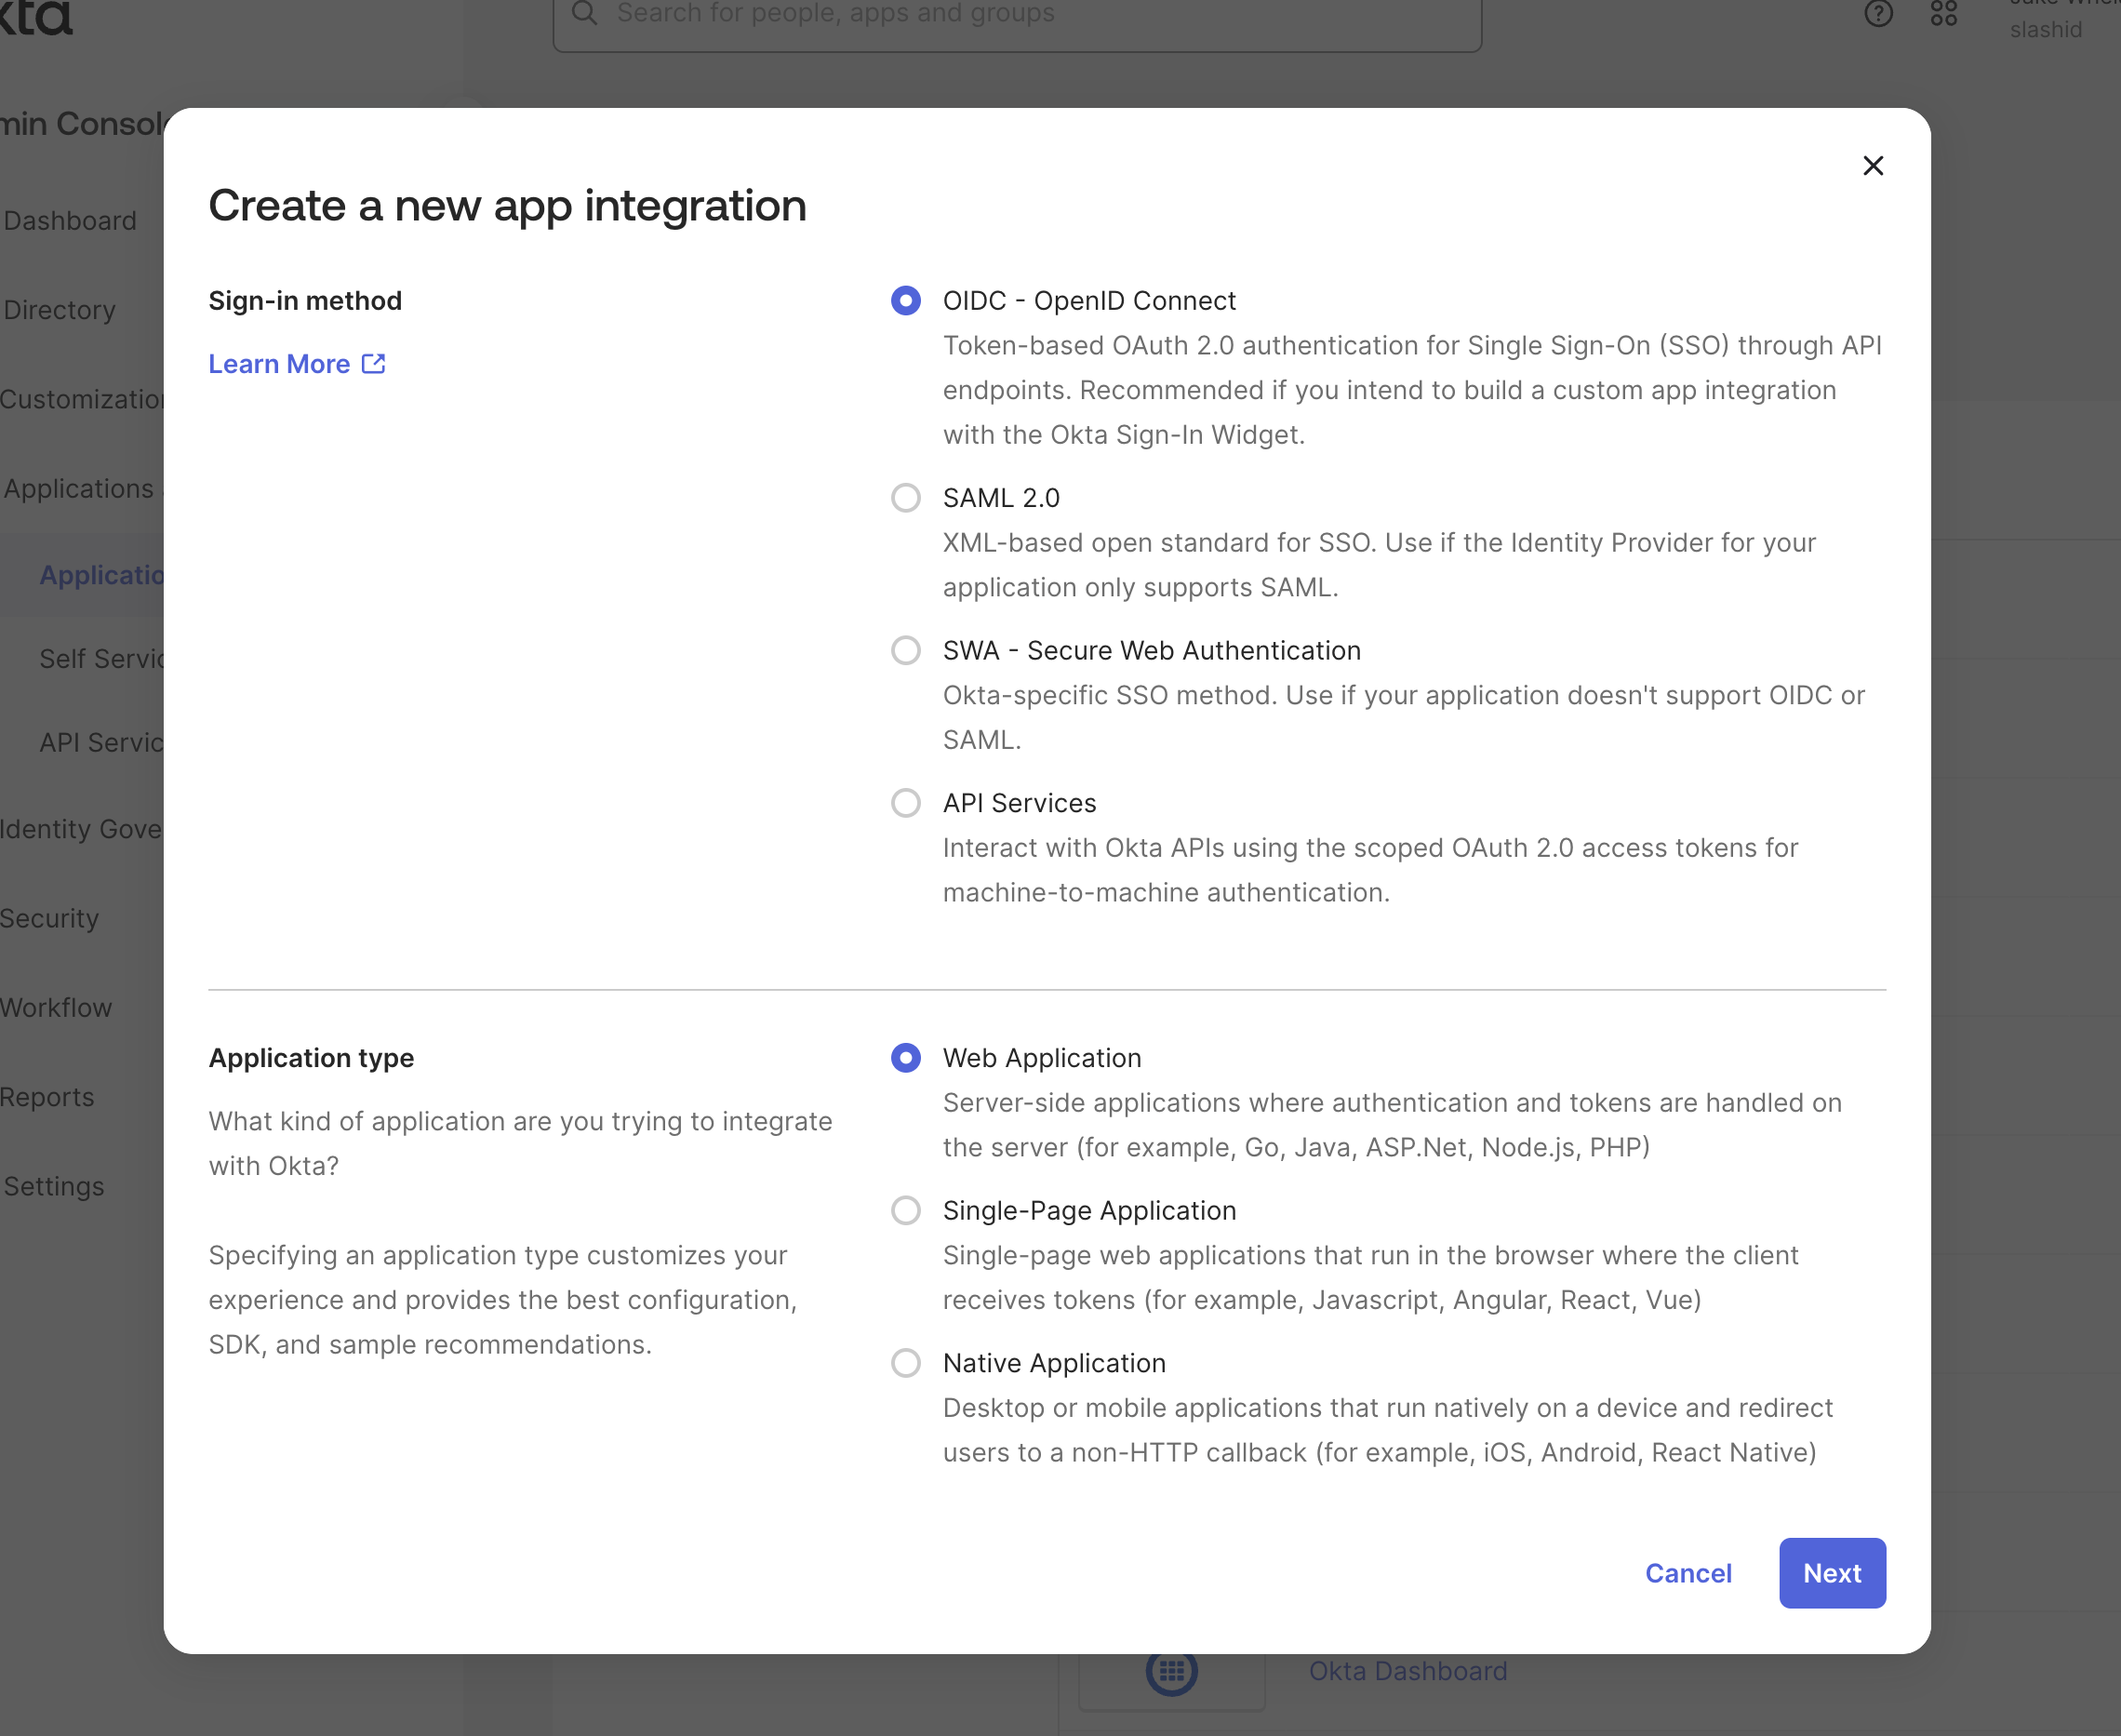
Choose 'Create App Integration'.
Under 'Sign-in method', select 'OIDC - OpenID Connect'. Under 'Application type', select 'Web Application'. Press 'Next'.
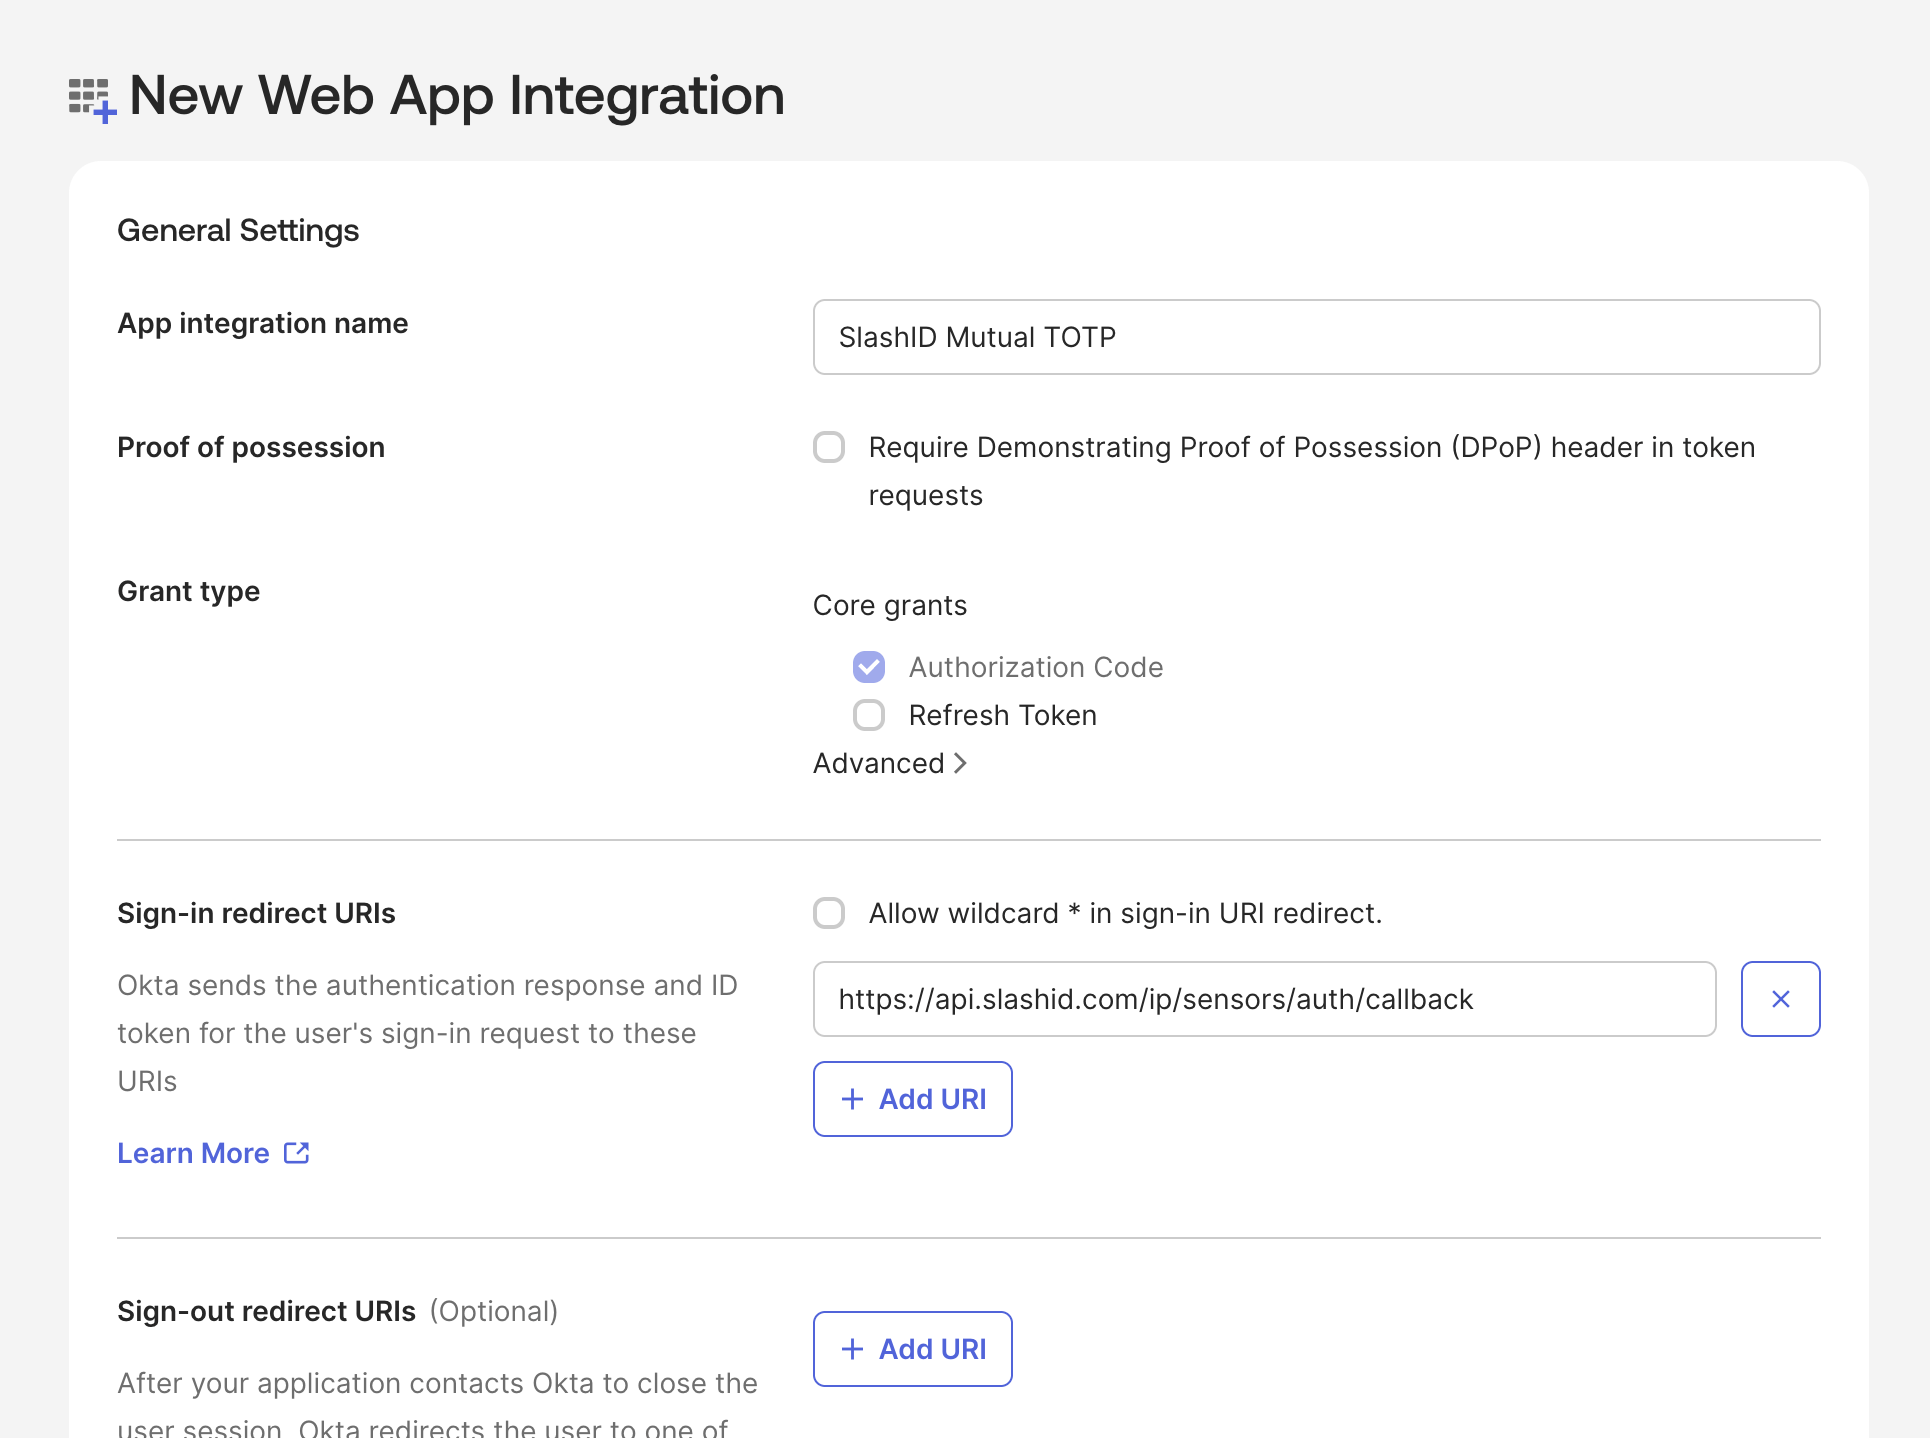
Enter a name for this integration, for example
SlashID Mutual TOTP.Under 'Grant type', leave 'Authorization Code' selected. This is the default, and it is the only grant SlashID needs.
Under 'Sign-in redirect URIs', enter:
https://api.slashid.com/ip/sensors/auth/callback
Step 2: Assign the application
Okta only lets people sign in to an application they are assigned to. Anyone who will use a sensor needs an assignment, or they will be turned away at the Okta sign-in page.
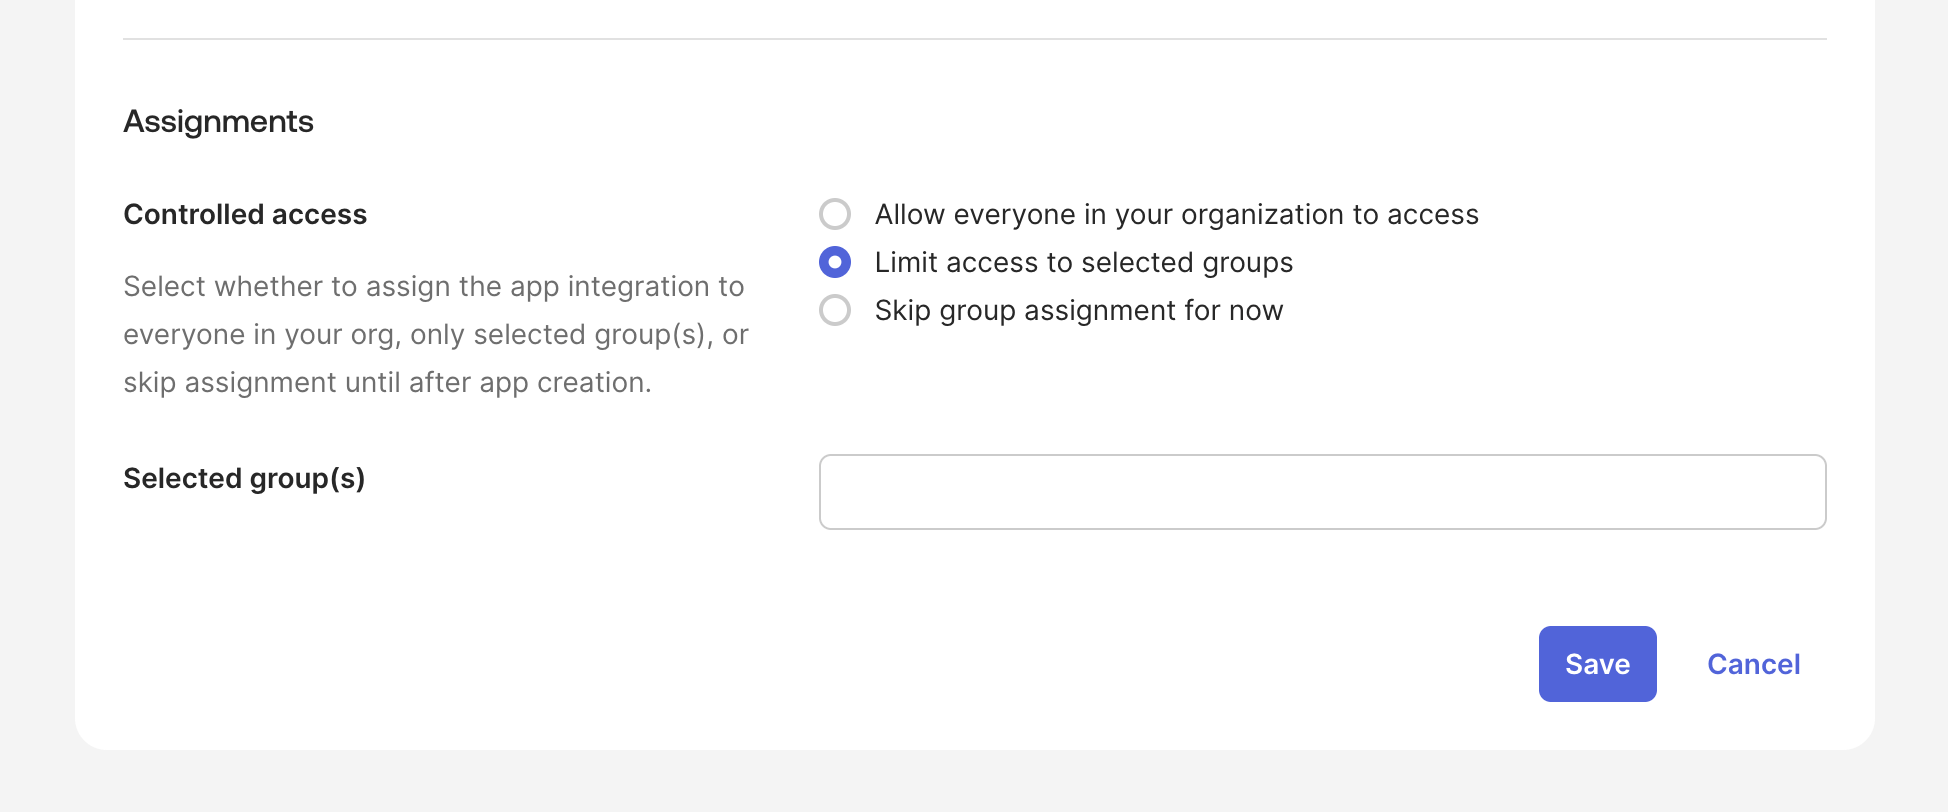
Still in the creation wizard, find the 'Assignments' section.
Choose either:
- 'Allow everyone in your organization to access' - the simplest option if sensors are for all staff, or
- 'Limit access to selected groups' - then pick the groups that should have sensors.
Press 'Save'. Going forward, we'll call this your SlashID app integration.
You can change assignments later from the 'Assignments' tab of the app integration. If you are setting this up for a trial or a demo, assigning just yourself and the people taking part is enough.
Step 3: Obtain the client ID and secret
Open your SlashID app integration and select the 'General' tab.
Under 'Client Credentials', copy the Client ID.
Copy the Client secret. You will need to enter both in the SlashID Console later.
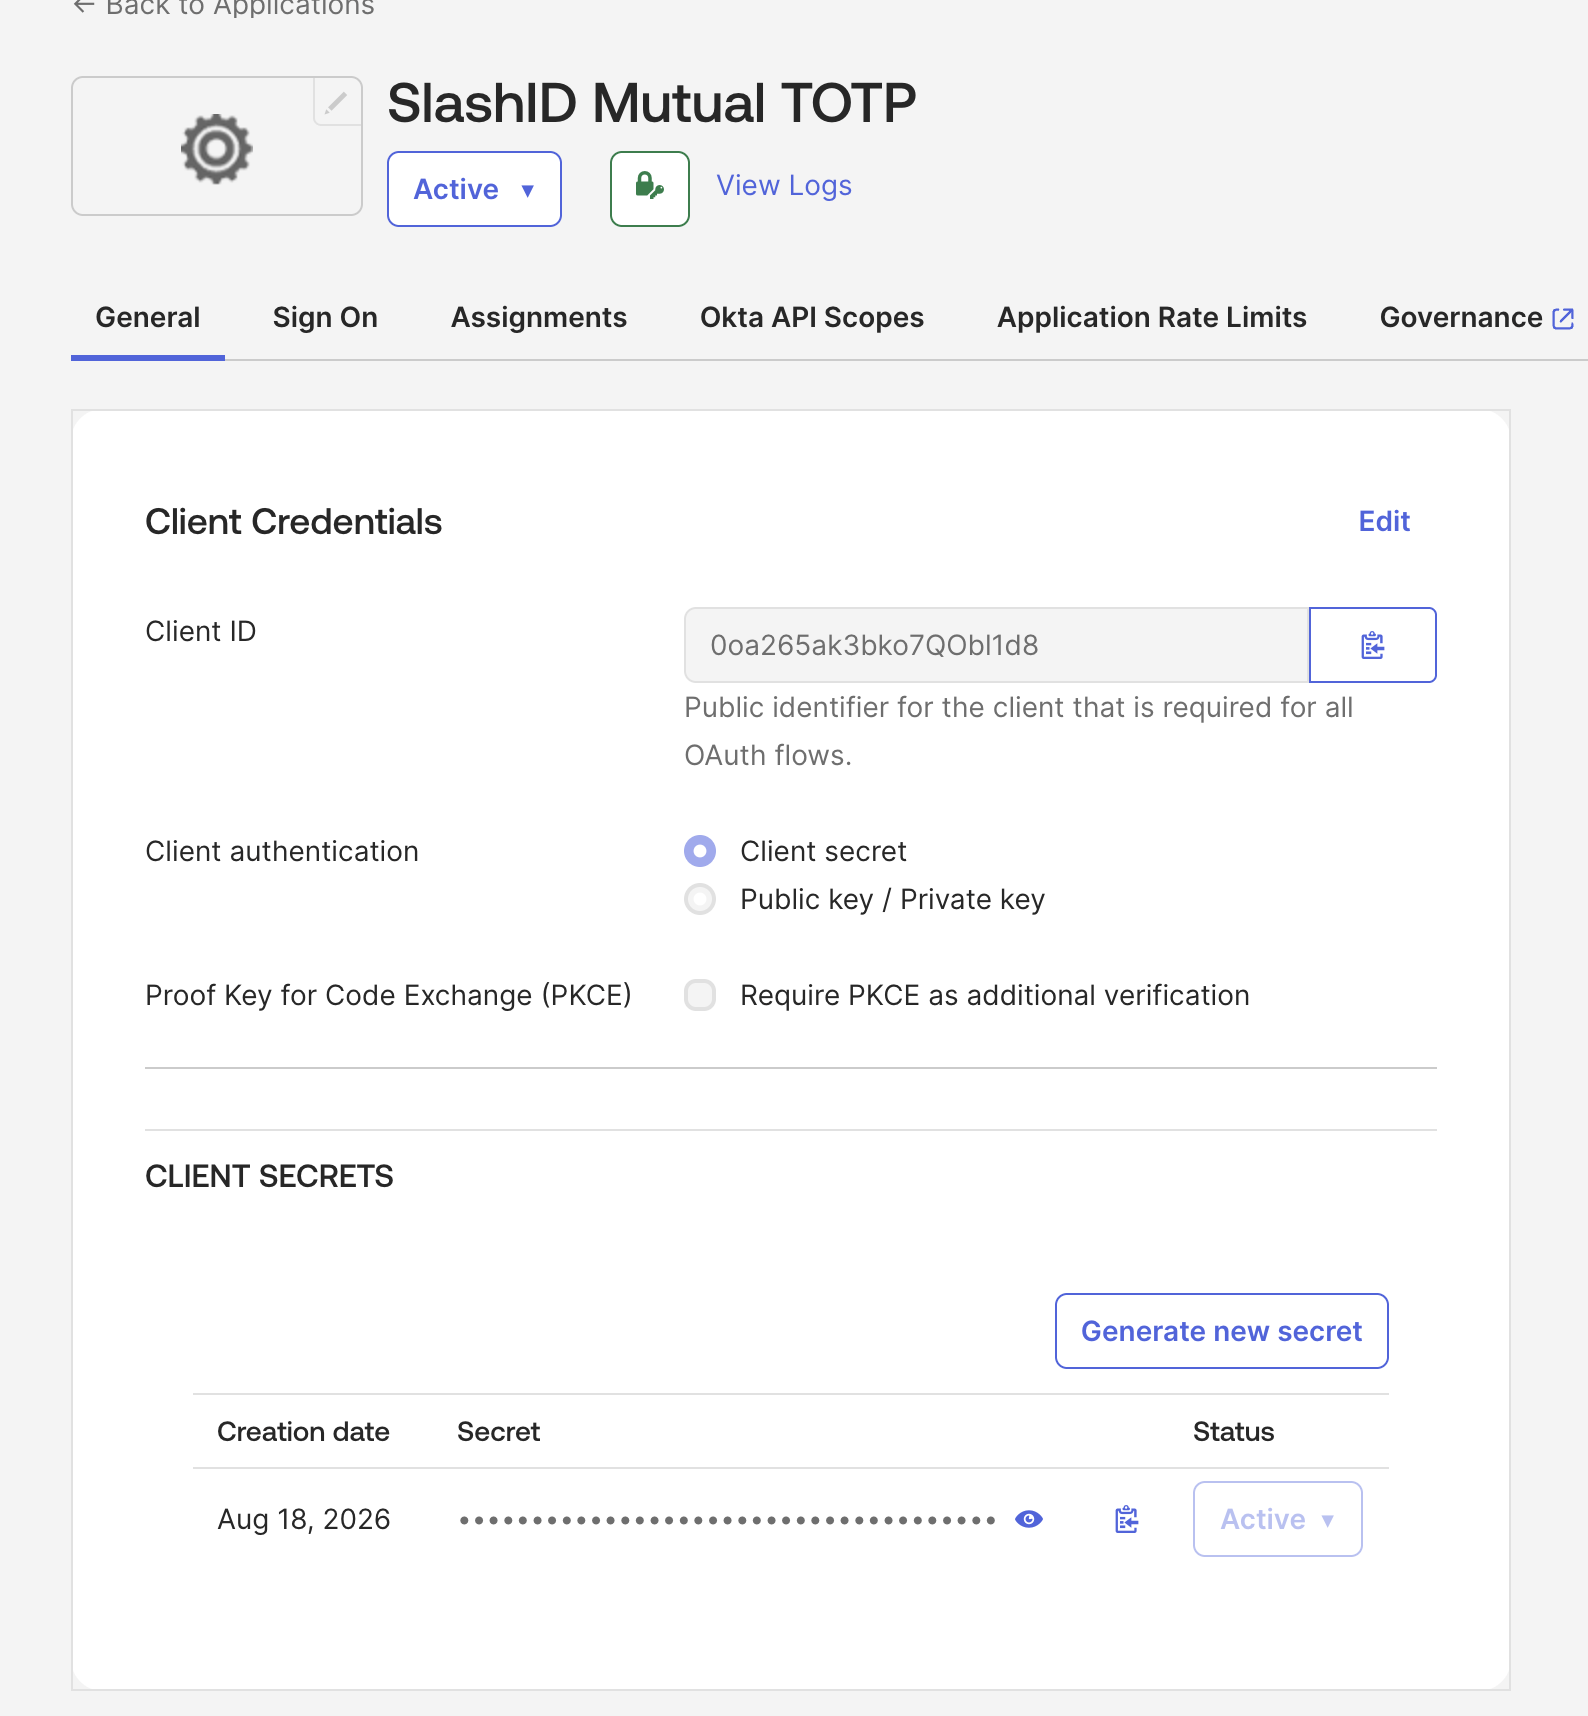
Unlike Entra, Okta lets you return to this page and read the client secret again, so you do not have to capture it on first sight. Treat it as a credential all the same.
Step 4: SlashID Console configuration
Go to the SlashID Console > 'Identity Protection' > 'Configuration' > 'Data sources'.
Open the SlashID Browser Extension data source.
Fill in the connection details:
SlashID Console field Description OAuth Client ID The client ID obtained in step 3 OAuth Client Secret The client secret obtained in step 3 Identity Provider Login URL Your Okta domain, for example https://yourorg.okta.comSwitch Require IDP authentication on. This is the master switch for verification: with it off, the credentials you just entered go unused and no sensor shows a verification screen.
Save the configuration.
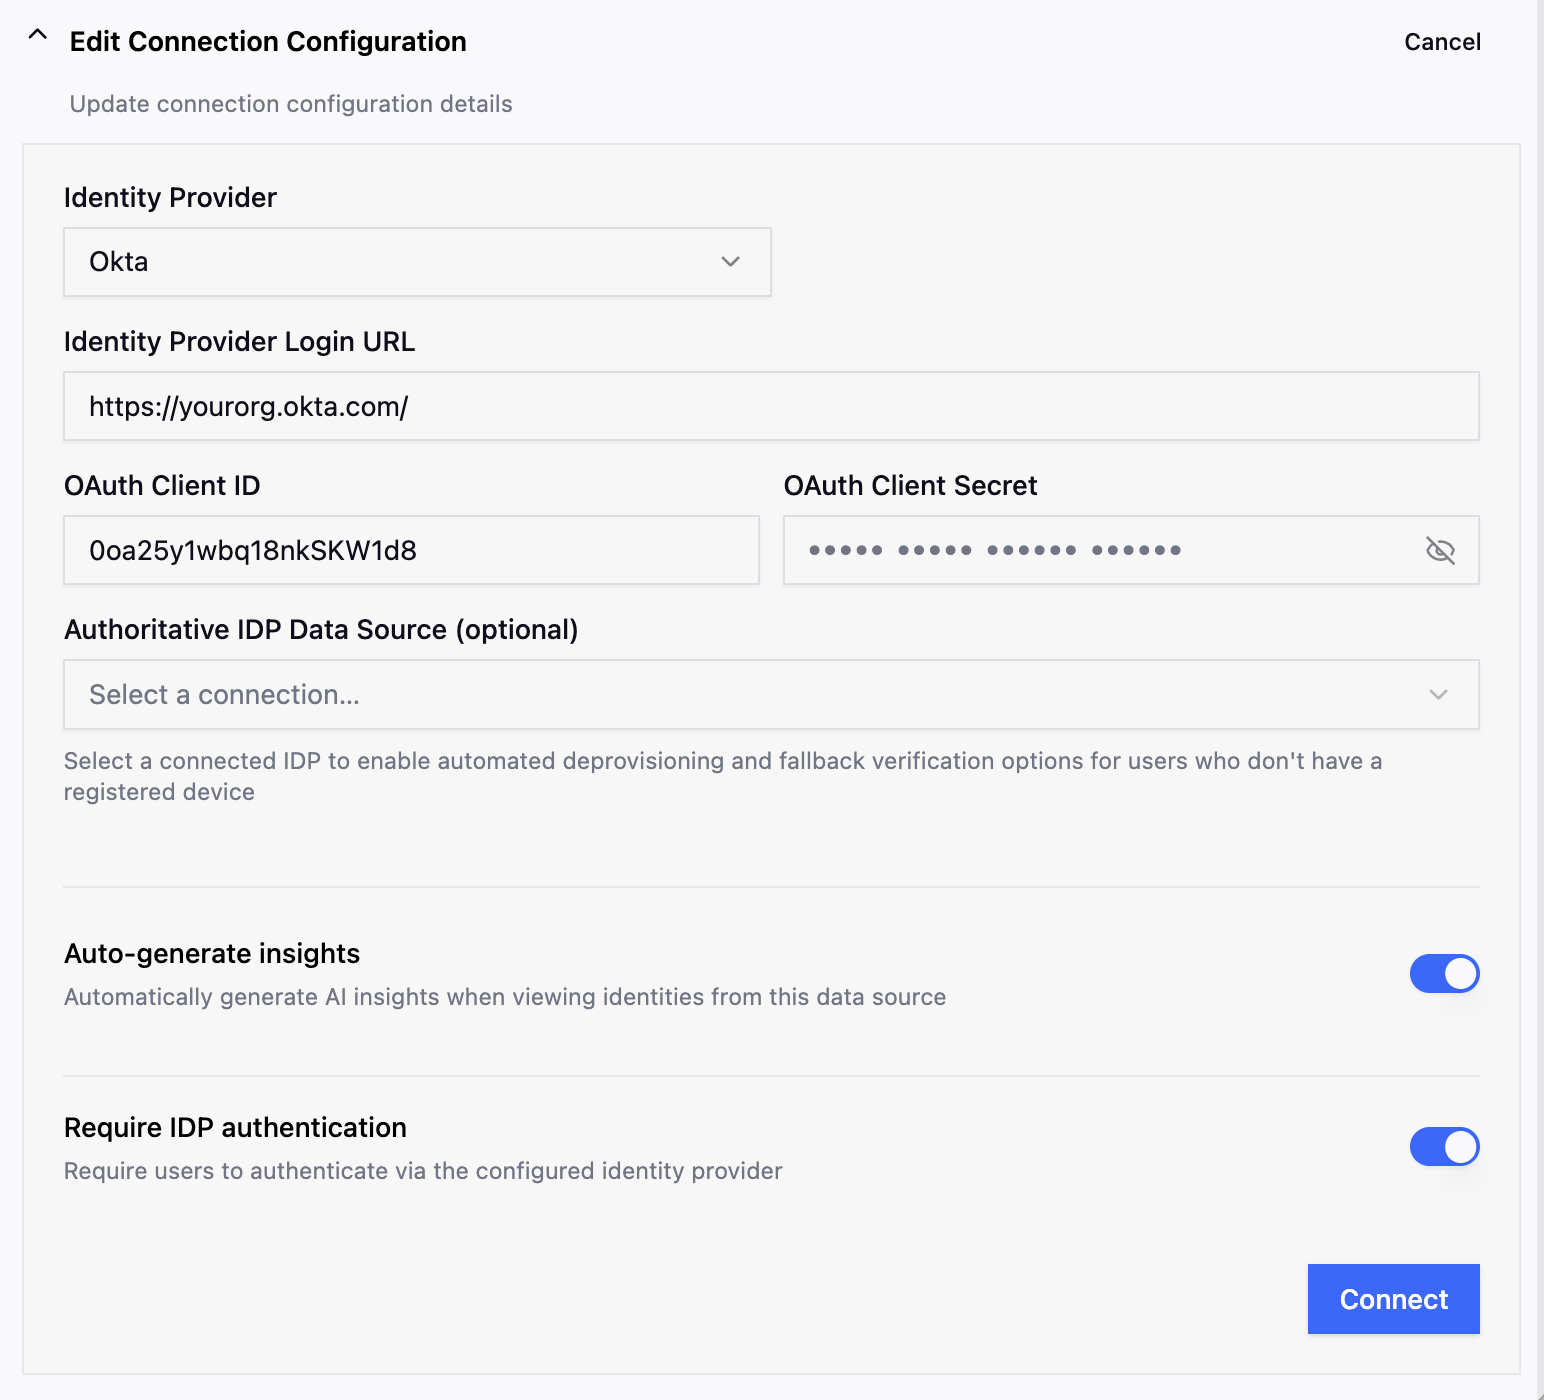
Require IDP authentication is easy to miss - it sits on the same tab as the credentials rather than with the other verification settings. If sign-in works but nobody ever sees a verification screen, check this switch first. See Turning verification on.
Your users can now sign in with their Okta identity from a SlashID app and take part in identity verification.
Next, see Troubleshooting for what each of the remaining settings on this page decides.