Entra setup
Before a sensor can take part in a verification, the person using it signs in with their corporate identity. This guide shows you how to register a SlashID application in Microsoft Entra ID so your users can authenticate with Entra, and how to provide the resulting credentials to SlashID.
First, you will create an Entra App Registration, add the SlashID redirect URI, grant it the permissions needed to identify the signed-in user, and generate a client secret. Second, you will enter the Application (client) ID and client secret in the SlashID Console.
You only ever share the Application (client) ID and client secret with SlashID. Your tenant ID and user data stay in Entra.
Okta, Google and SAML identity providers are also supported. For Okta, see Okta setup; the others require a comparable application registration on the provider's side — contact SlashID support for the details of the one you use.
Step 1: Create an Entra App Registration
Log in to the Microsoft Entra admin center.
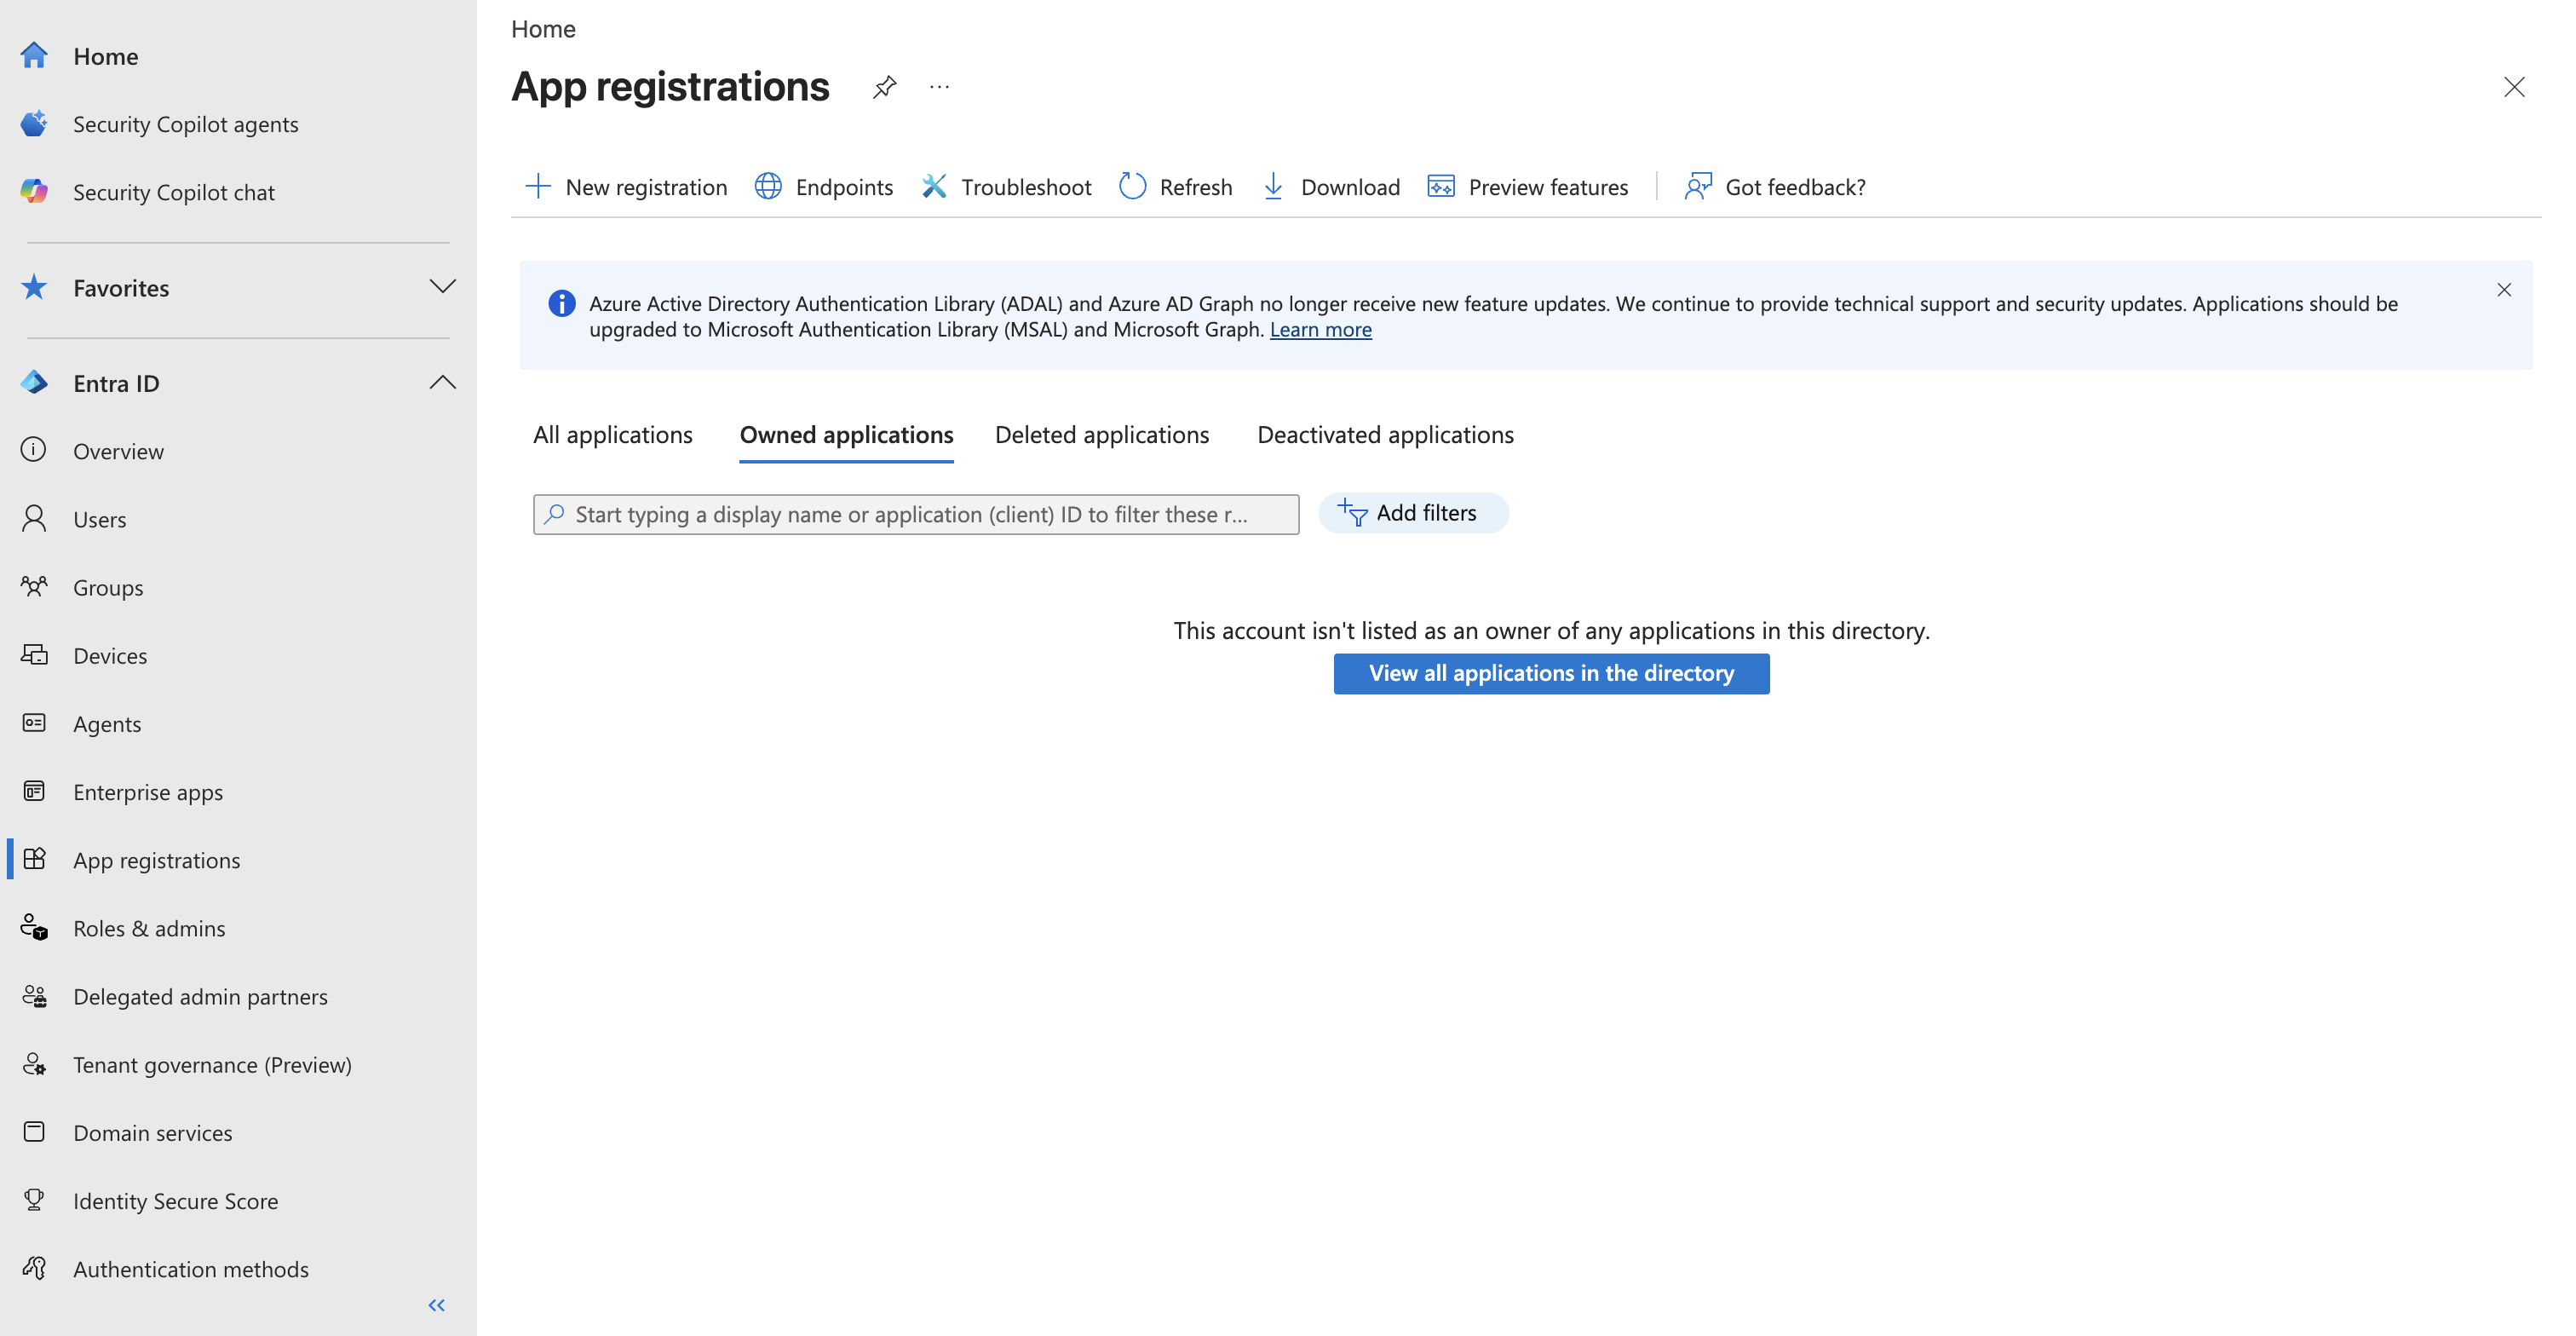
From the menu on the left, select 'Identity' > 'Applications' > 'App registrations'.
From the horizontal menu at the top of the page, choose 'New registration'.
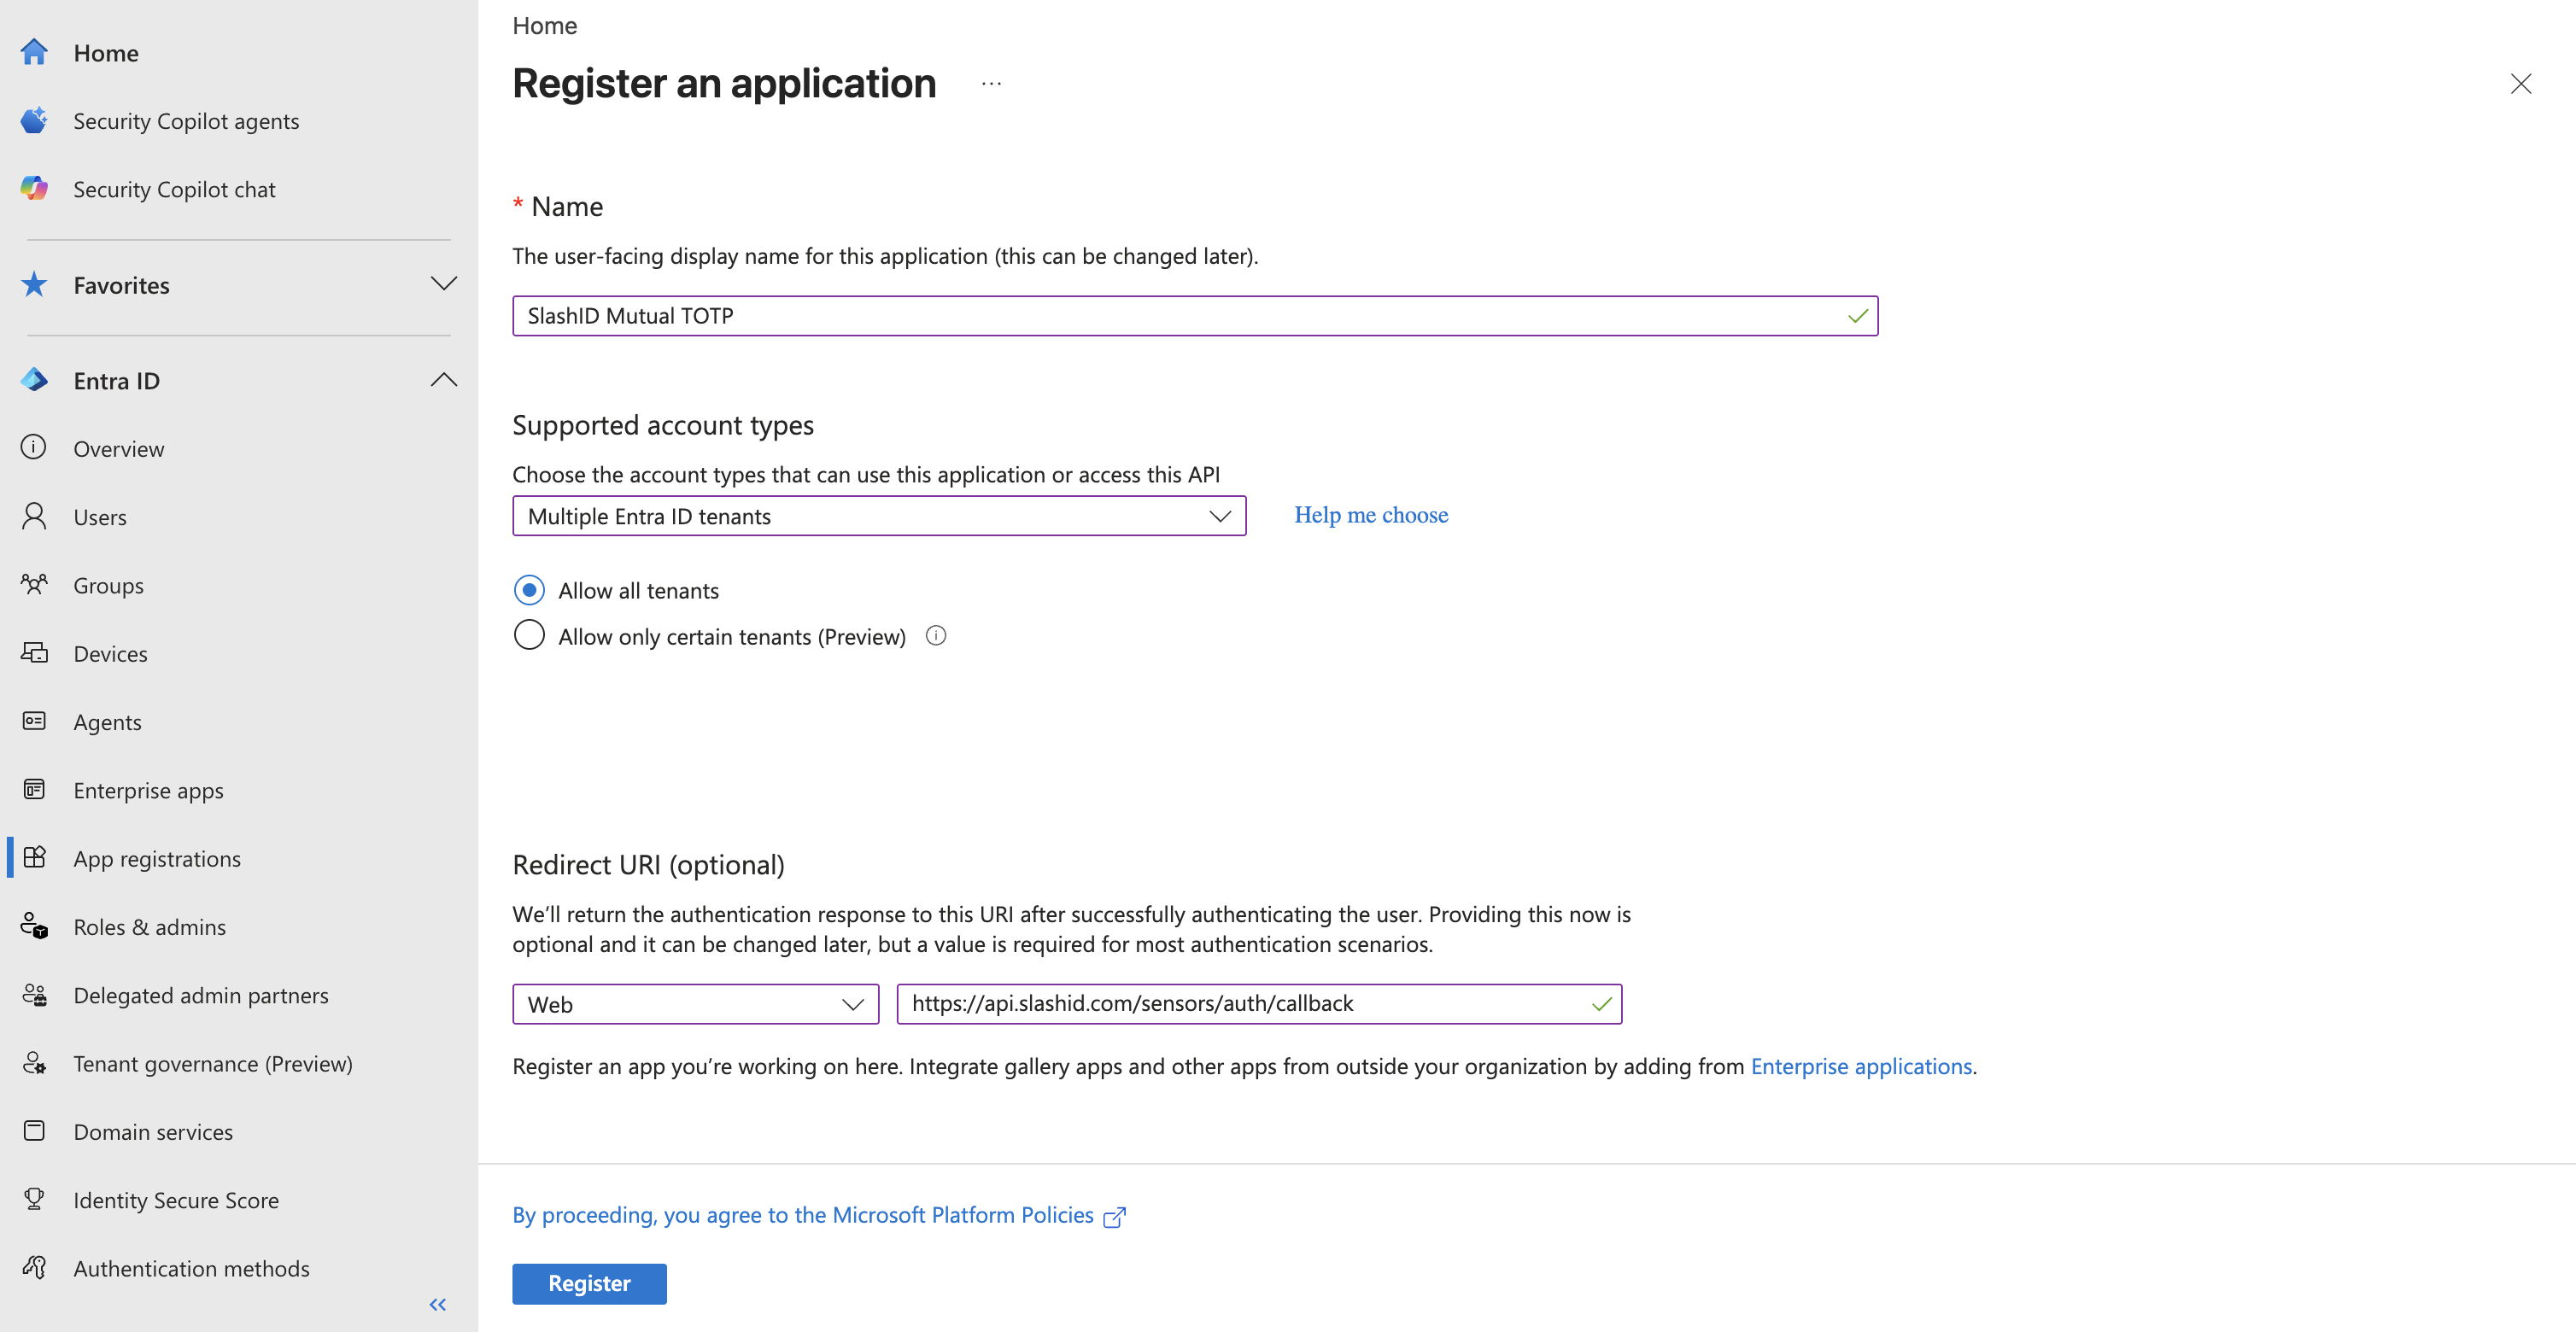
Enter a name for this app registration, for example
SlashID Mutual TOTP.Under 'Supported account types', choose the option appropriate for your organization.
Under 'Redirect URI', select 'Web' and enter:
https://api.slashid.com/ip/sensors/auth/callbackPress 'Register' to confirm. Going forward, we'll call this your SlashID App Registration.
Step 2: Grant permissions
SlashID needs to read the signed-in user's basic profile to identify them during the handshake.
In your SlashID App Registration page, select 'Manage' > 'API permissions' from the side menu.
Choose 'Add a permission', then 'Microsoft Graph', then 'Delegated permissions'.
Add the following permissions:
Permission Purpose openidSign the user in with OpenID Connect profileRead the user's basic profile emailRead the user's email address User.ReadRead the signed-in user's profile Press 'Add permissions' to confirm.
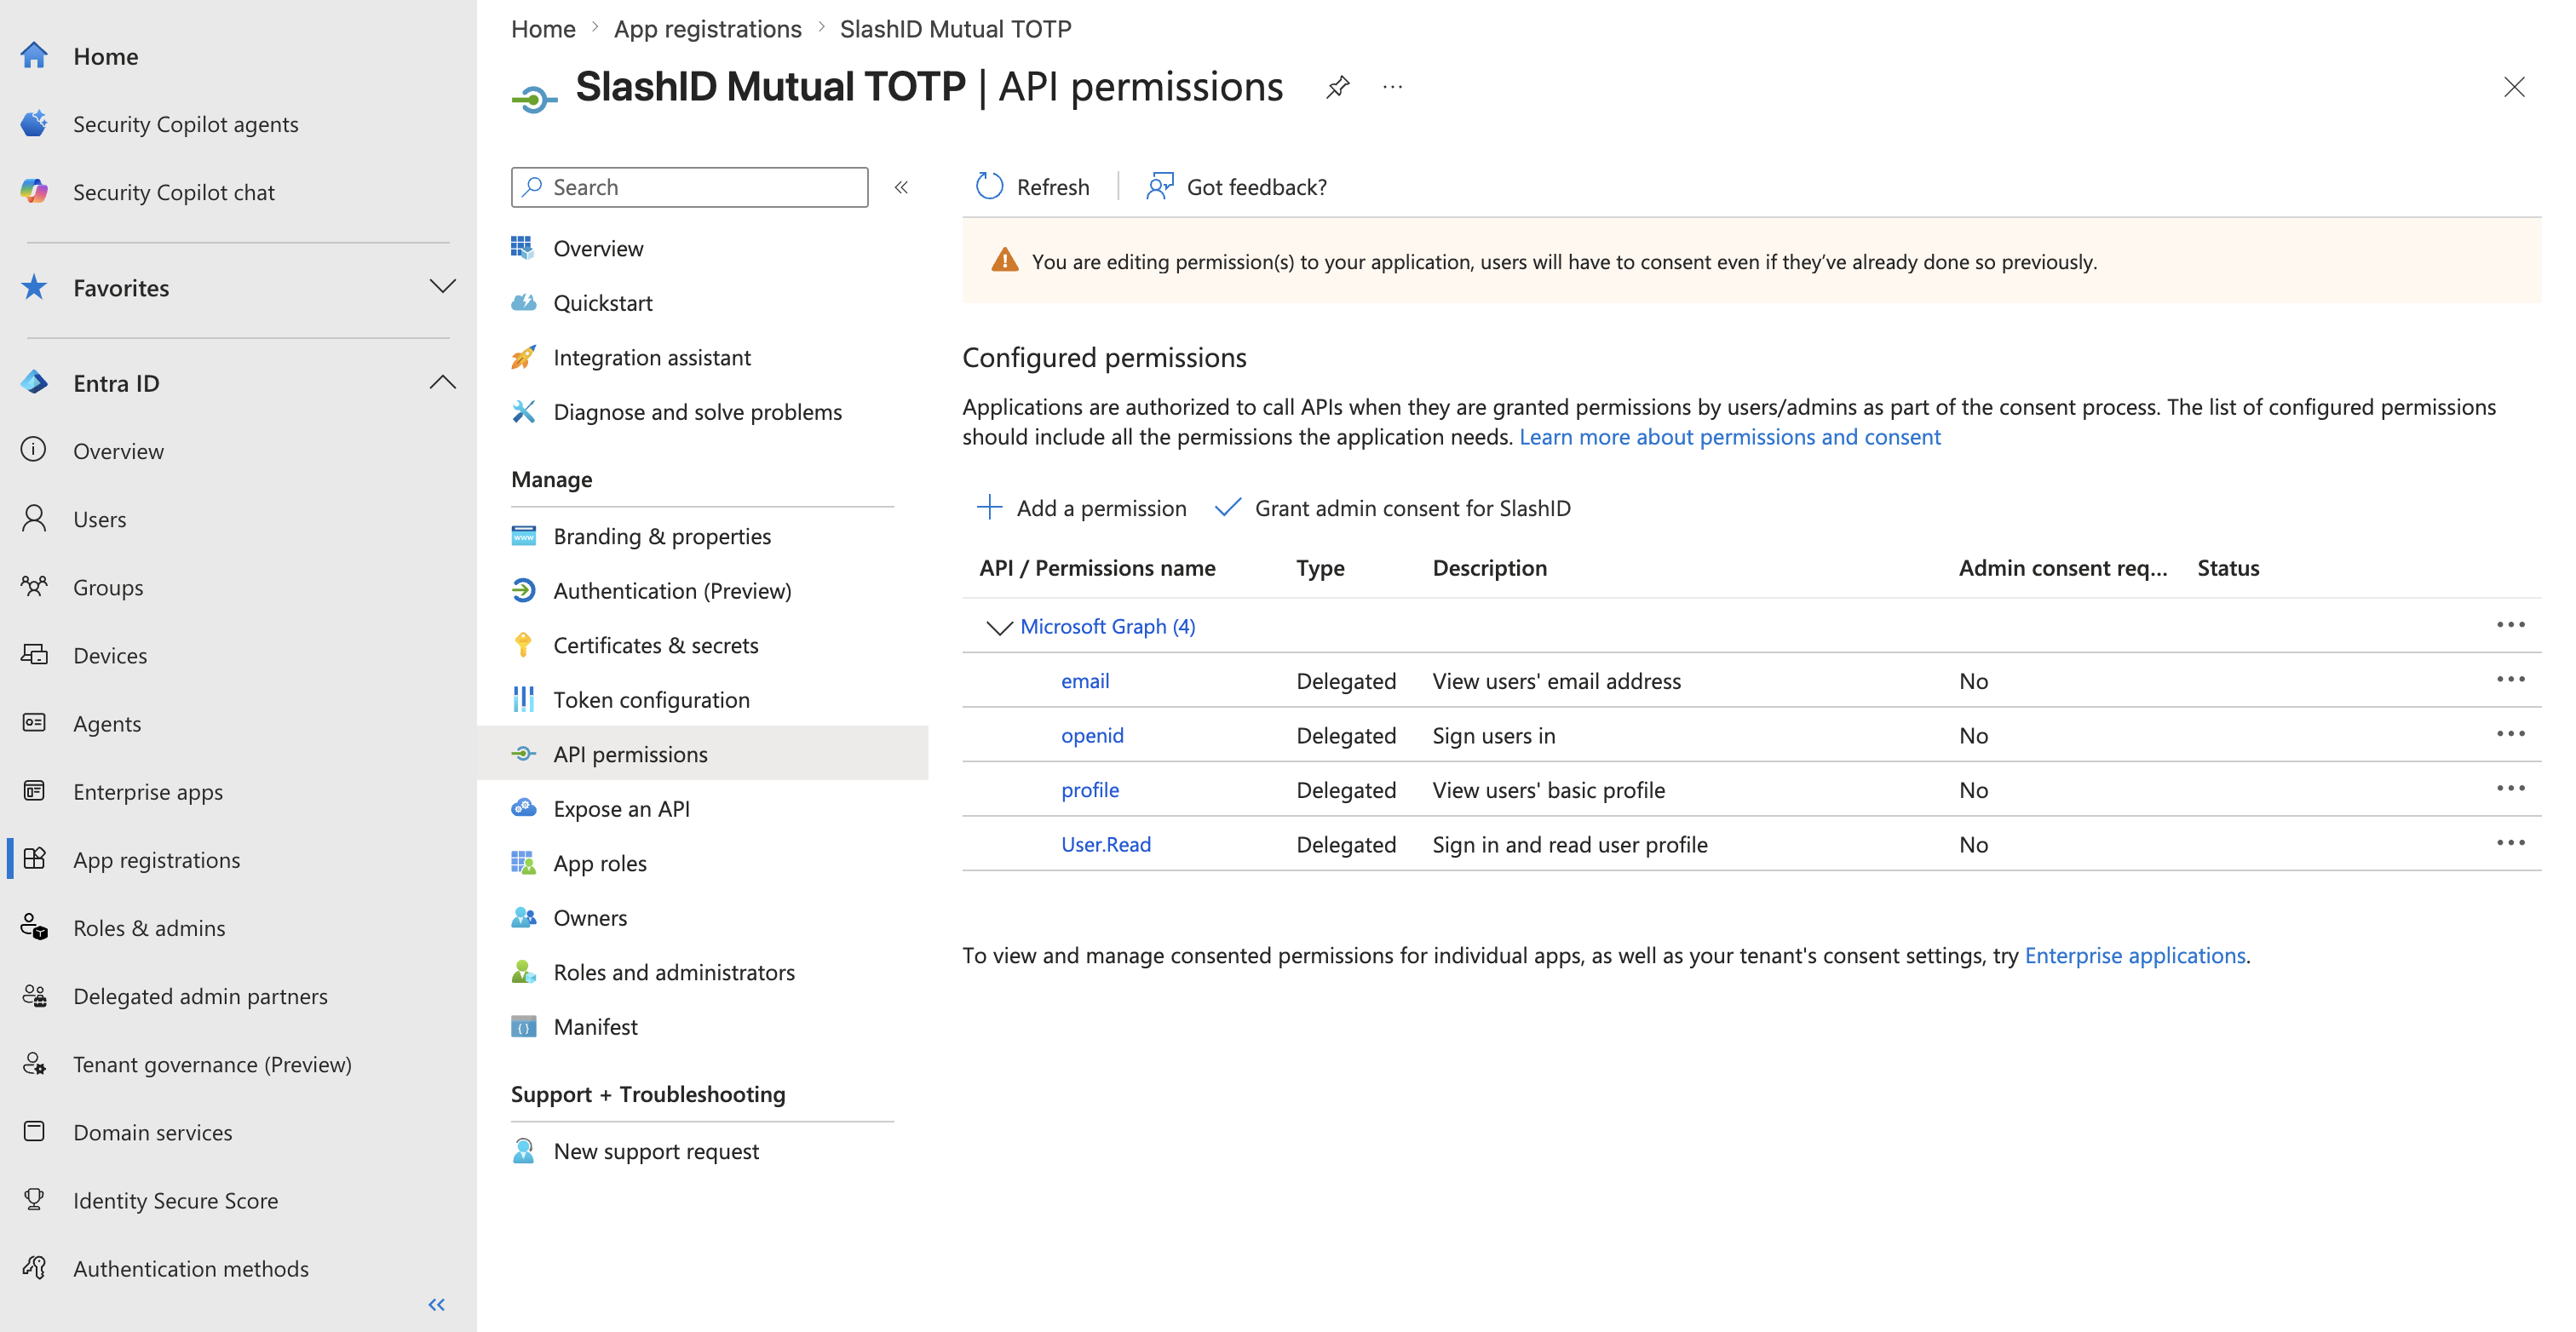
These are delegated permissions that act on behalf of the signed-in user. If your organization requires admin consent, grant it from this page after adding the permissions.
Step 3: Generate a client secret
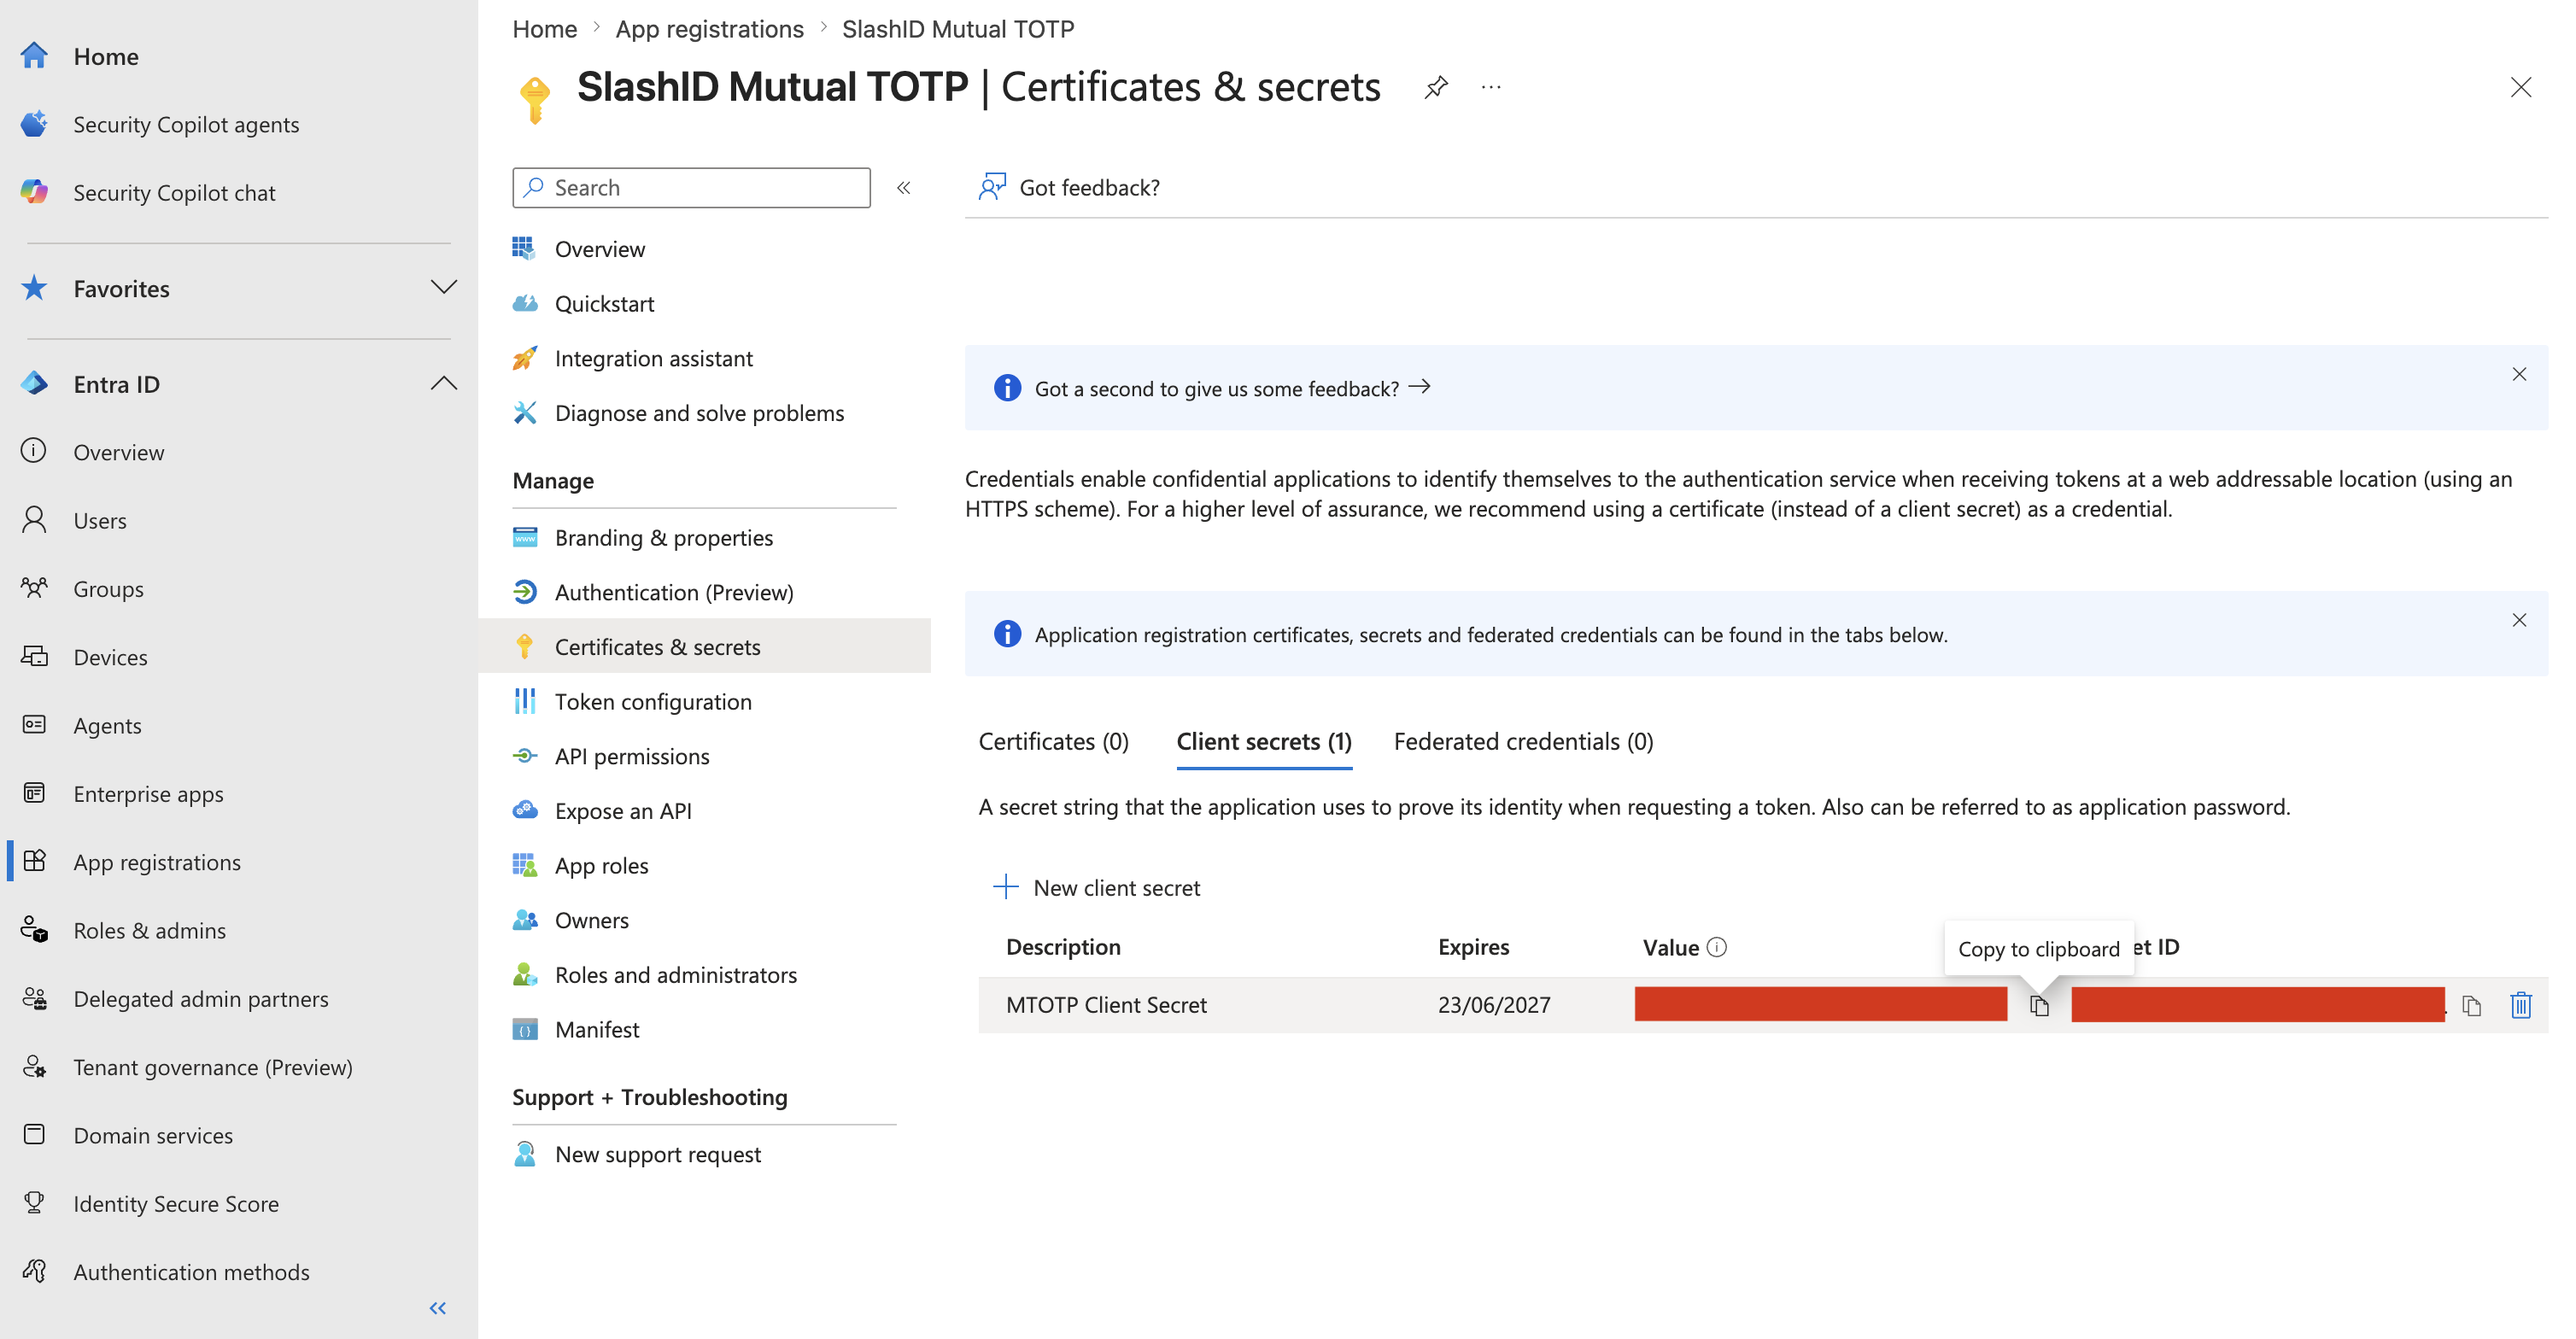
In your SlashID App Registration page, select 'Manage' > 'Certificates & secrets' from the side menu.
Under 'Client secrets', choose 'New client secret'.
Enter a description and a duration for the new client secret and press 'Add'. We recommend 365 days as the expiry period.
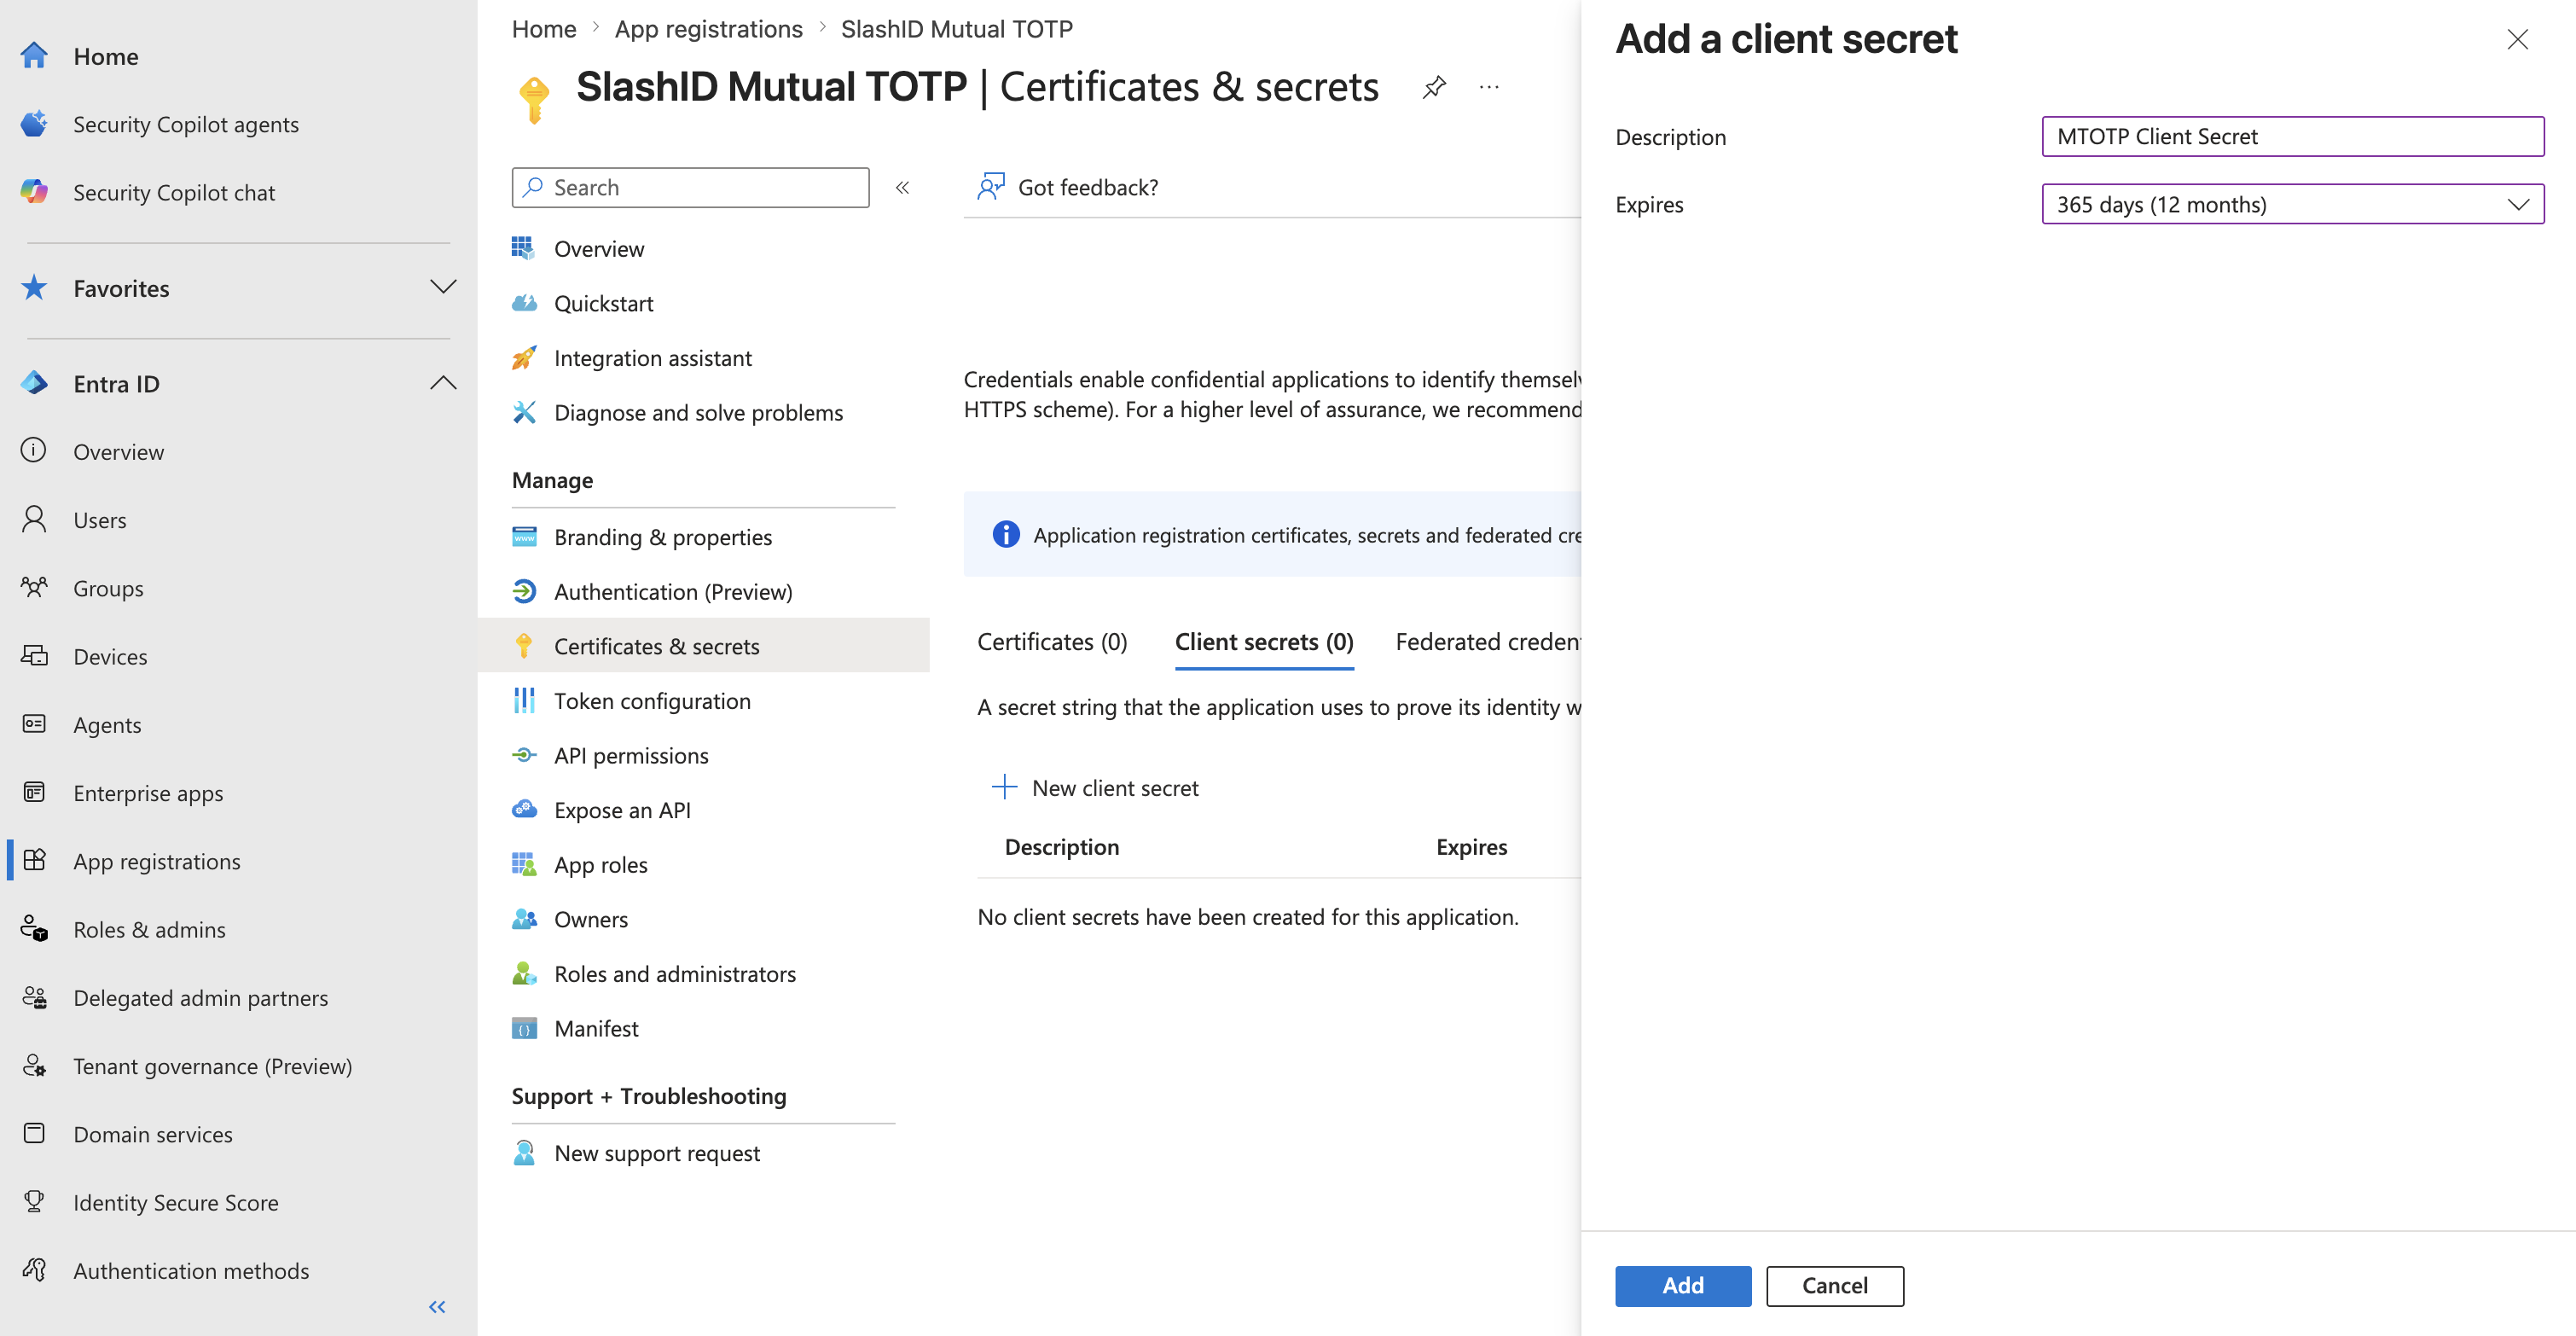
- Copy the secret Value and keep it safe — you will need to enter it in the SlashID Console later, and it cannot be retrieved again after you leave this page.
Step 4: Obtain the client ID
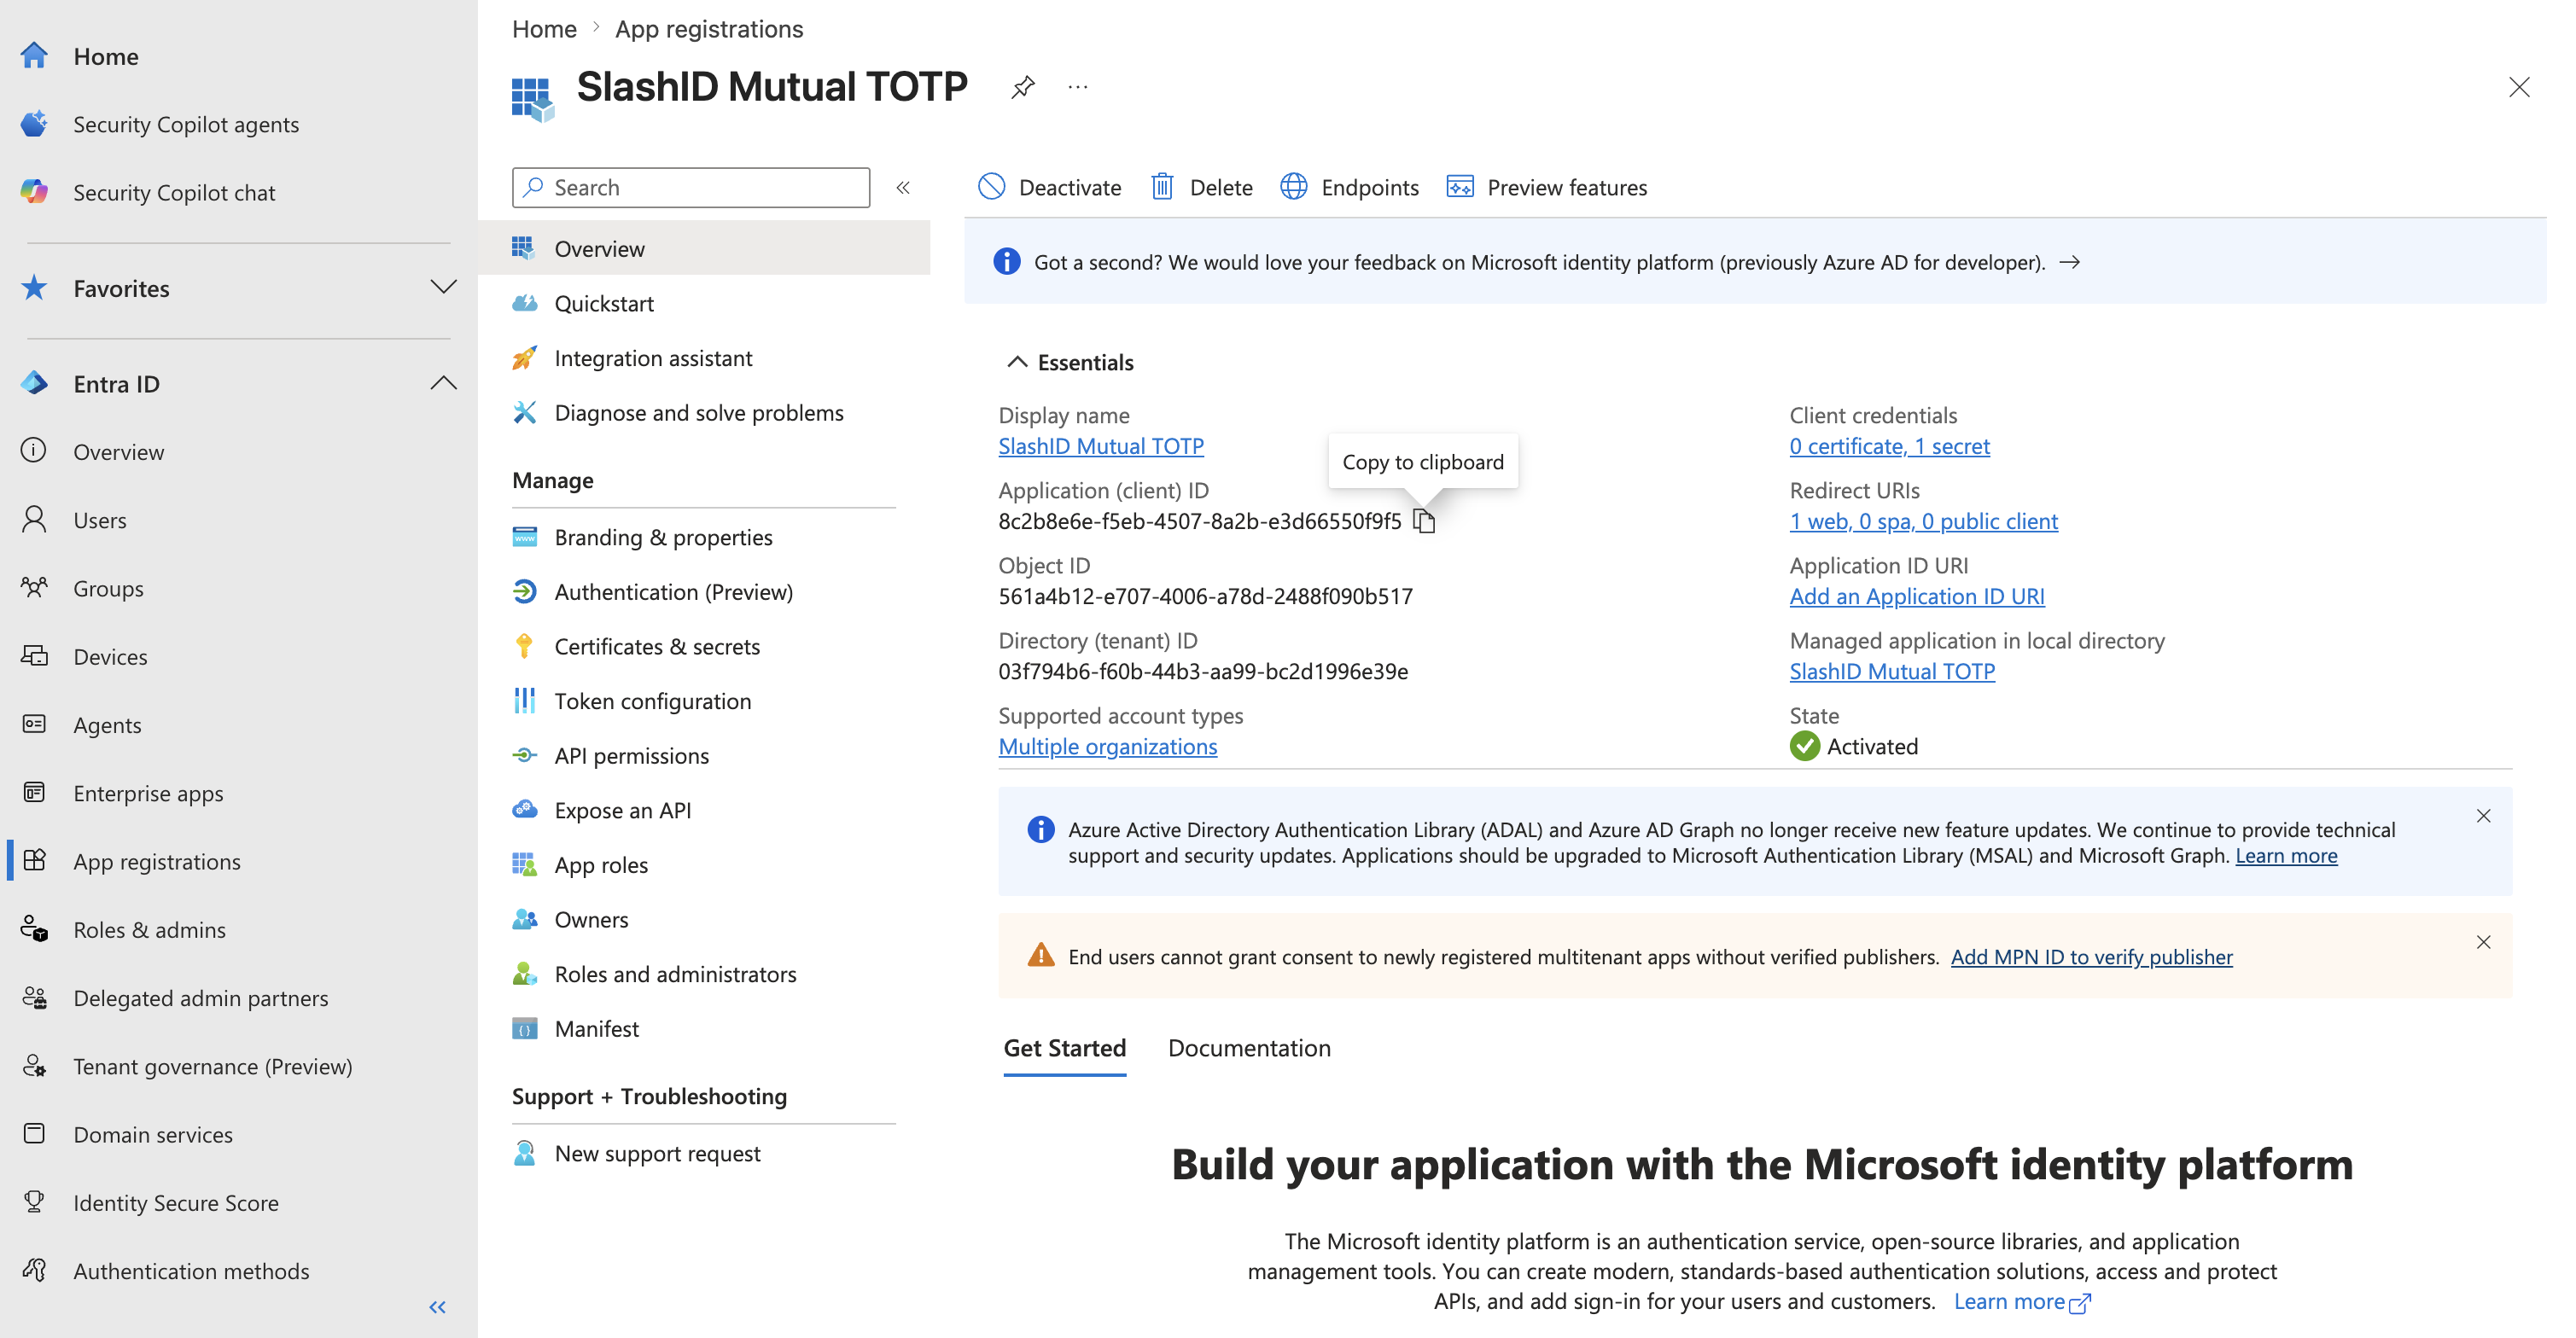
In your SlashID App Registration page, select 'Overview' from the side menu.
Copy the 'Application (client) ID'. You will need to enter it in the SlashID Console later.
Step 5: SlashID Console configuration
Go to the SlashID Console > 'Identity Protection' > 'Configuration' > 'Data sources'.
Open the SlashID Browser Extension data source.
Fill in the connection details:
SlashID Console field Description Application (client) ID The client ID obtained in step 4 Client secret The client secret obtained in step 3 Save the configuration.
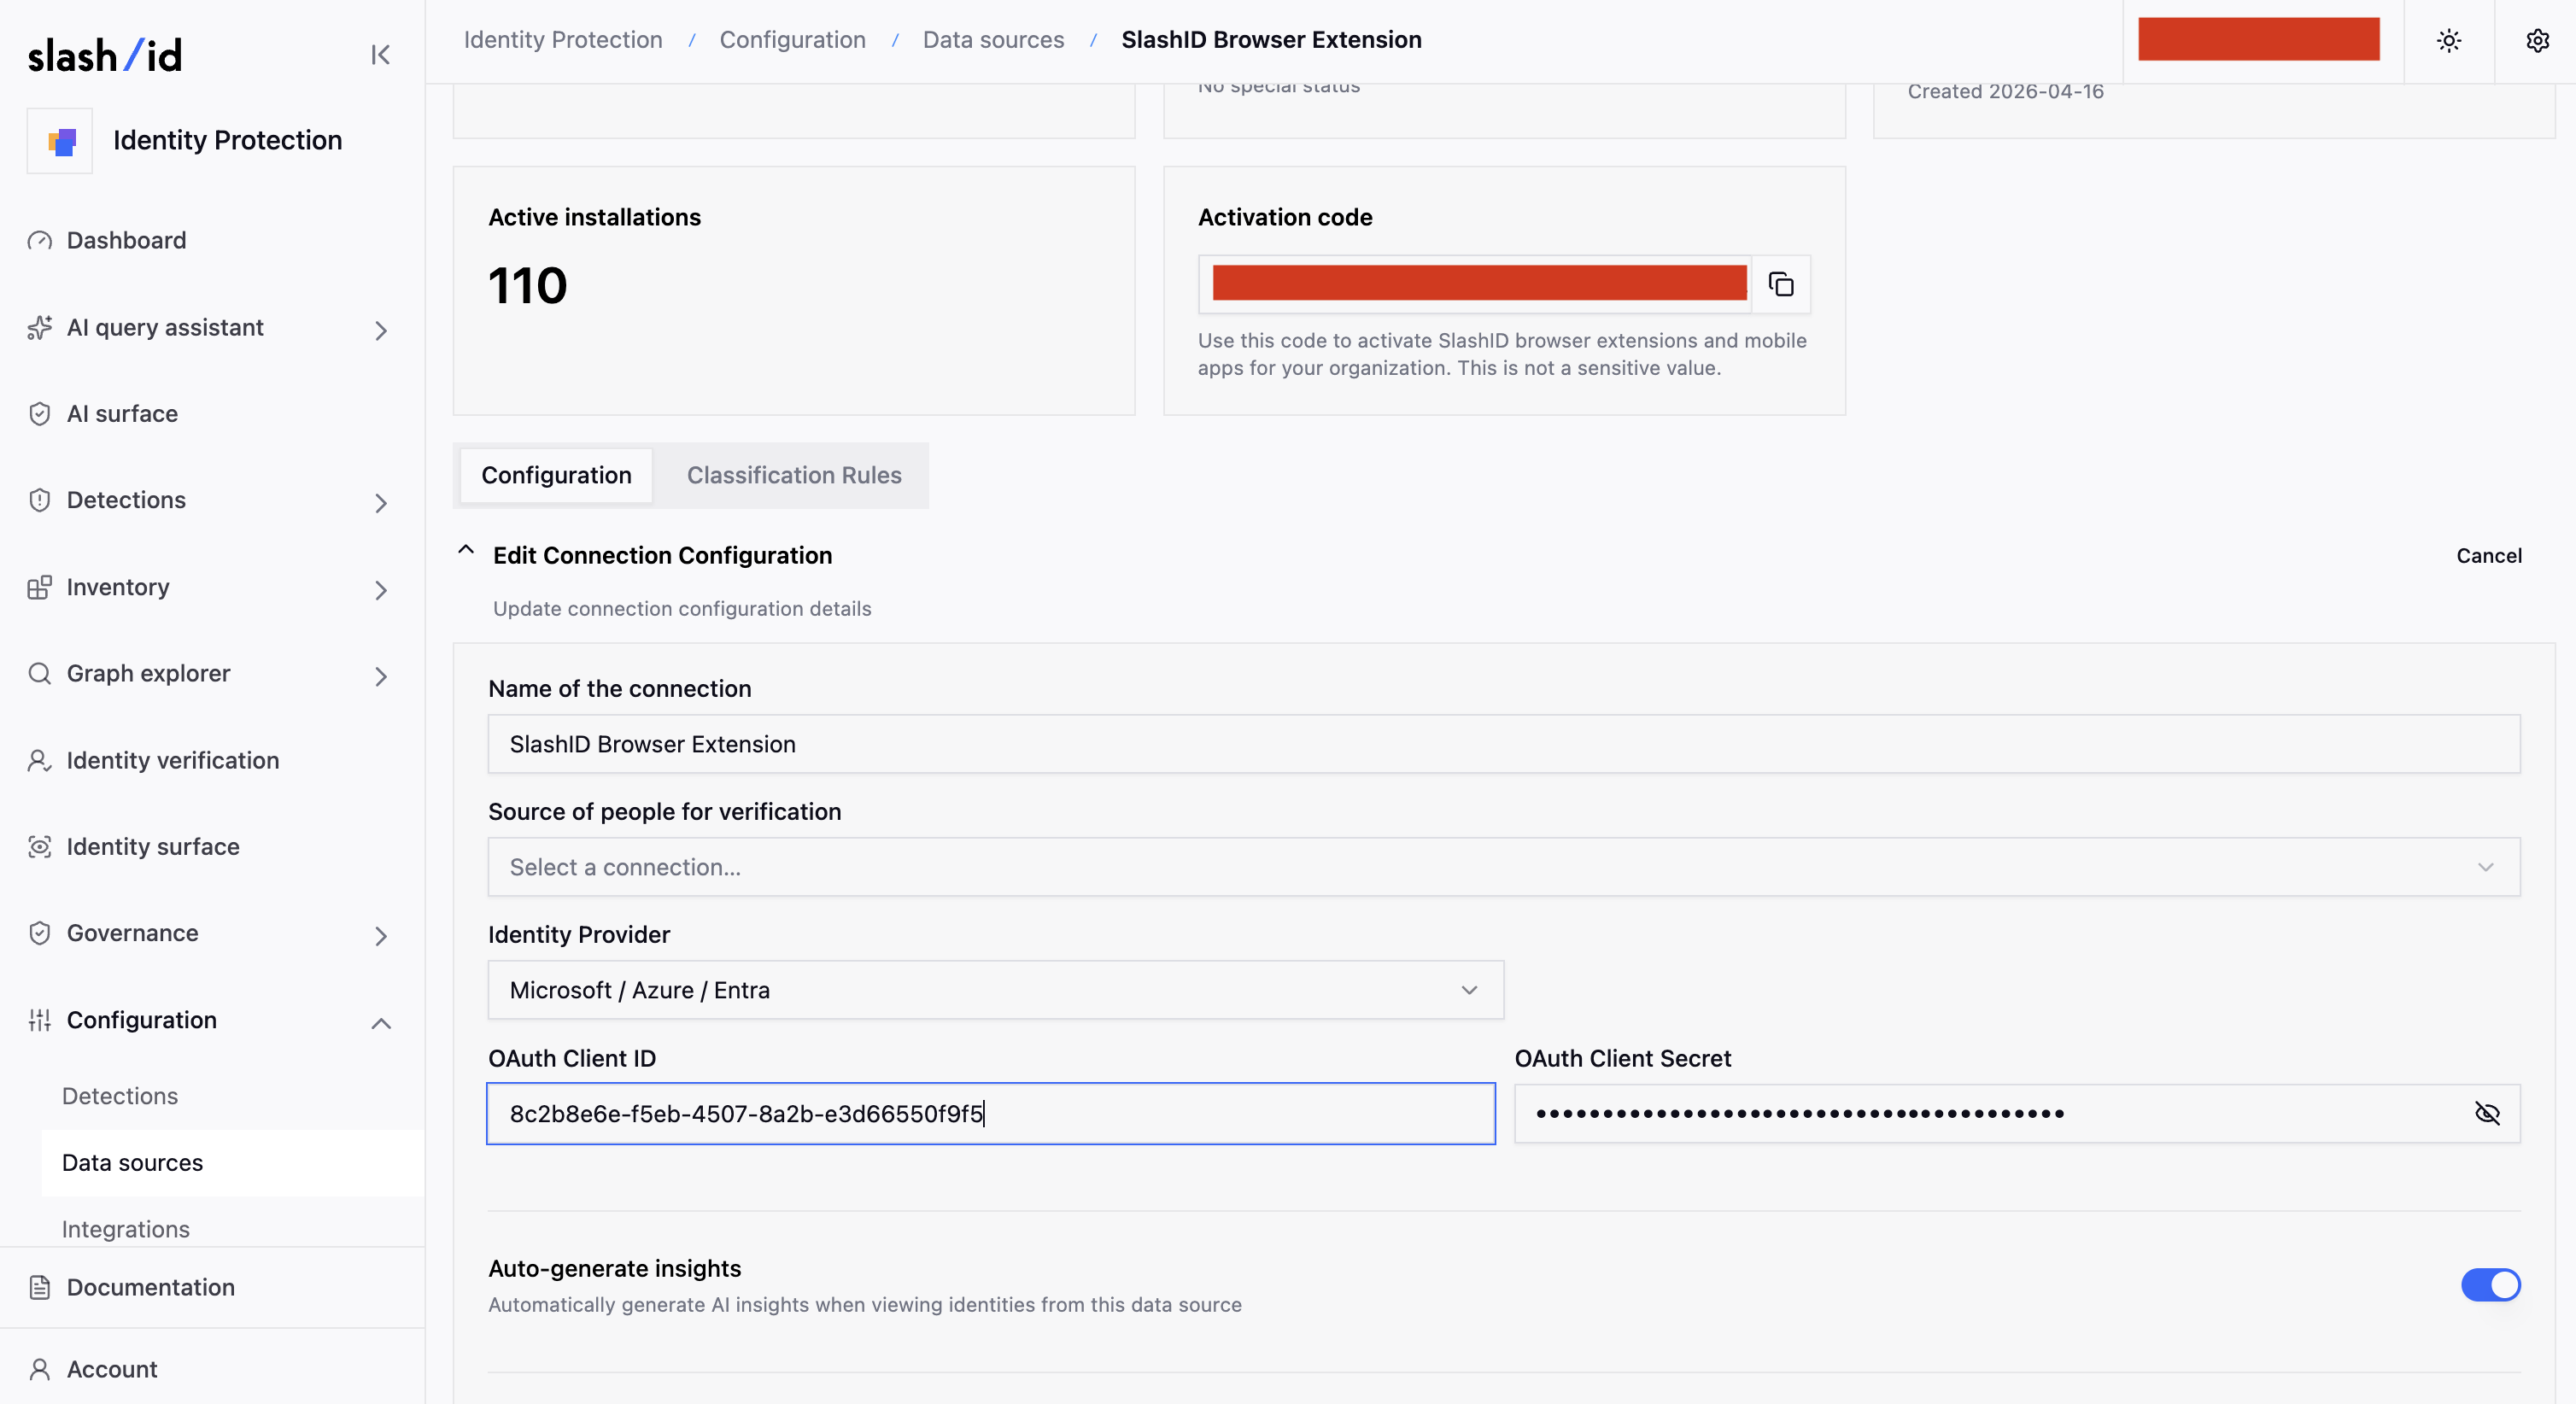
Your users can now sign in with their Entra identity from a SlashID sensor and take part in identity verification.
Next, see Troubleshooting for what each of the remaining settings on this page decides.